Pages

Monday, October 31, 2011

Chocolate Oatmeal

For some reason my husband associates Halloween with oatmeal. I don't know where the association comes from since he says he didn't usually have it for breakfast on Halloween when he was a kid or anything, but that's okay! I'm willing to roll with it. When he told me he wanted oatmeal for breakfast on Halloween last year I was happy to oblige and found this chocolate oatmeal recipe. I've changed it a bit (surprise!) and we love it. You could also add a touch of cinnamon or top individual bowls with mini marshmallows if you want.


Chocolate Oatmeal

2 C water
1/2 C milk
1 C old fashioned oats
1/4 t salt
1/2 C brown sugar
1 t vanilla extract
1/4 C chocolate chips

optional: whipped cream and chocolate chips for garnish

Bring the water and milk to a boil in a medium sauce pan. Stir in oats and salt and simmer, stirring frequently, until oats are cooked and thickened (3-5 minutes). Remove from heat and stir in brown sugar, vanilla extract and chocolate chips. If desired, spoon the oatmeal into bowls and top with whipped cream ghosts with chocolate chips for eyes.

Yield: 4 servings

Deviled Eyes

These spooky eyes are a yearly tradition for us. Mostly because we love any excuse to have deviled eggs and these are really cute! You can use your favorite deviled egg recipe. Normally I put dill in mine but I don't when I make these because I don't want little flecks of dill in the eyes.

Deviled Eyes

6 hard boiled eggs
4 T mayonnaise
1 T dijon mustard
1/2 t salt
1/4 t onion powder
4 drops green food coloring
for garnish: sliced olives

Cut the eggs in half and place the yolks in a shallow bowl. Mash with a fork. Add the mayonnaise, mustard, seasoned salt, onion powder and food coloring and stir to combine. Alternatively, you can mix it all up in the food processor so you won't have any little bits of yellow yolk showing in your green filling. Scoop the mixture into a small plastic bag and snip off the tip of one corner, then pipe the filling into the egg halves. Press one sliced olive into each egg half and arrange on a plate to look like pairs of angry eyes.

Yield: 6-12 servings

Vampire Bat Legs (aka Spicy Chicken Legs)

HAPPY HALLOWEEN! Okay, I know you probably aren't going to rush out to make Vampire Bat Legs for Halloween dinner tonight and eating something called Vampire Bat Legs any other time of year is rather odd, but the good thing is the rest of the time you can just call them Spicy Chicken Legs since that's what they are. We had these chicken legs (er, bat legs!) for dinner last night and they were SO good! The flavors combined perfectly. Kind of sweet, limey, spicy. My husband handles spicy pretty well and he thought they were hot too. I don't eat the skin so wasn't subjected to the full heat blast but the sauce did get cooked onto the exposed part of the chicken legs and I put a little dollop of it on my plate. The recipe also includes a lime sour cream sauce to dip the chicken into and that helped temper the heat in a very delicious way. The original recipe actually called for a full teaspoon of cayenne pepper in addition to the chipotle peppers. I left that out because I wanted us to have some tastebuds remaining so we could enjoy our caramel apples. Regardless, this may not be a good choice for little kids. You could just put some BBQ sauce on some chicken legs and cook them in a separate dish at the same time. Oh and I served my Vampire Bat Legs with orzo (aka maggots- I know it's disgusting but I couldn't resist).

Do you have a digital probe thermometer? I mentioned it earlier but didn't go into a lot of detail. I love my digital probe thermometer. It's one of my favorite kitchen gadgets. The reason it's wonderful is that you can stick the probe into the meat (or whatever) and leave it there as it cooks so you can check the temperature without opening the oven door. You can also set it to beep once it reaches whatever temperature you specify. I'm very very safety conscious when it comes to raw meat and this means I don't have to worry about undercooking the meat but also don't have to worry about overcooking it. My thermometer also has a timer :D My pet cockatiels had babies last year and I ended up having to hand raise 2 batches of babies from when they were a week old and this thermometer was actually perfect for checking the temperature of their formula (vitally important) and monitoring the temperature of their brooder that was on a heating pad- I set it to go off if the temperature rose too high. Of course this is not the standard use for most people but it just shows one of the things you can do with digital probe thermometers :D

Anyway, on to the recipe:


Vampire Bat Legs (aka Spicy Chicken Legs)

Chicken:
8 chicken legs
2/3 C BBQ sauce (I used Sweet Baby Ray's)
1/2 of an 8 oz can chipotle peppers in adobo sauce
1/2 t salt
1 T chili powder
1 T minced garlic
6 T lime juice
Cool Lime Sauce:
1 C sour cream
1-2 T lime juice (I used 2 T)
1 green onion, thinly sliced
1/4 t salt

Combine all ingredients for the chicken in a gallon zipper bag and squish it around so everything's mixed and all the chicken is coated. Refrigerate for 30 minutes. While it's refrigerating you can make the Cool Lime Sauce by simply stirring together the ingredients. Preheat oven to 425, line a 9 by 13 baking dish with aluminum foil, and grease the foil. When 30 minutes are up, pour everything from the bag into the baking dish and evenly arrange the chicken legs. Bake 15 minutes and then brush the chicken with the sauce in the dish. Bake 15 minutes longer or until a thermometer inserted into the thickest part of the biggest chicken leg registers 165 degrees. Remove chicken from oven and brush again with the sauce (I suggest washing your brush first because there may be raw chicken juices on it from the first time you basted). Serve the chicken with the Cool Lime Sauce to help soothe the burn.
Yield: 4 servings (2 legs each)

Friday, October 28, 2011

Baked Mice (aka Mini Meatloaves)

I got the idea for these cute (or as cute as meatloaf can be) little Halloween mice from this recipe. They were easy to make and ended up tasting really good too. I would make these mini meatloaves the rest of the year sans mousie features. Lean ground turkey is usually pretty dry when made into meatballs or meatloaf, but I think the little hunk of cheese in the middle helped because mine didn't turn out dry at all. The cheese did leak a bit out of some of the mice but I think that just added to the effect! And yes, the noodle tails do cook completely in the oven. Serve the mice with mashed potatoes (the sauce is good on them) and a veggie.


Baked Mice

1.25 lb package ground turkey
1 egg
1/2 C seasoned bread crumbs
1 t garlic powder
1 t onion powder
1 t salt
1/2 t pepper
8 3/4 inch cubes cheddar cheese
3 spaghetti noodles, broken into thirds
16 oz can tomato sauce
4 T brown sugar
3 T yellow mustard
2 T Heinz chili sauce (not the spicy Asian kind- this is optional)
1/4 t black pepper
16 very thin carrot slices
16 black olive slices
Preheat oven to 350 and grease a 7 by 11 baking dish. Combine the ground turkey, egg, bread crumbs and spices. Form 1/8 of the meat around a cheese cube, sealing well. Form a point on one end and make the other end rounded. Place in baking dish and stick one of the spaghetti thirds into the rounded end to make a tail. Repeat with the rest of the meat, cheese cubes and noodles. Stir together tomato sauce, brown sugar, mustard, chili sauce and pepper and pour over the mice, making sure to cover the tails. Cover with foil and bake 20 minutes, then remove foil and bake until mice are cooked through (165 degrees in the middle), about 20 minutes longer. Arrange mice on plates, cut a small slit on either side of the heads, and insert carrot slices for ears. Place olive slices on the face to make eyes.

Yield: 8 mice, 4-8 servings

Wednesday, October 26, 2011

Chicken Strips

This recipe is from one of my favorite blogs, Southern Plate. If you've never checked out Southern Plate, you should. Christy is so sweet and nice! I've tried a lot of her recipes and have rarely been disappointed. This recipe for chicken strips (or chicken planks as she calls them) is no different. I first made them a year ago. It was my first time ever frying anything and I was a bit concerned but they turned out great! Tonight was my second time making them and again, great. Very easy to make and very good for an occasional treat if you want something really simple and homey. After tasting them you wouldn't guess they're breaded with only egg and crushed saltine crackers. They're quite filling too so I usually just serve them with a veggie.

I tend to only buy chicken breasts every 3 or 4 months and get a big package so I can get all the goo cleaned off and cut it into whatever size pieces I'll need for recipes before freezing. It works very well to pound the chicken and cut it into strips at this time so when I'm ready to make the chicken strips, all I need to do is thaw and bread them.

Quick Note: This particular chicken strip has pretty big pieces of cracker. It was just fine but feel free to crush them more if you want! My sleeve of crackers popped open on the end before I could get them crushed really finely and I just went with it.

Also, this recipe can be easily doubled. Just cook half the chicken, then add more oil and let it heat up again before cooking the rest!


Chicken Strips


1/2 lb chicken breasts
1 egg
about half a sleeve of saltine crackers
vegetable oil

Lightly beat the egg in a bowl. Thoroughly crush the saltine crackers with your hands while still in the plastic sleeve (if you only crush half the crackers, the rest should remain intact for later!) and then pour into a bowl. Place the chicken into 2 Ziploc bags (one inside the other) and pound to 1/4 inch thick with a meat mallet. Cut the breasts into strips as big as you'd like. One at a time, dip the chicken strips into the beaten egg, then press into the crushed crackers and set on a plate. I like to use a fork to move the chicken around because things don't get as messy that way. Once all the chicken has been coated, pour 1/4 inch of oil into a large skillet and heat over medium. When the oil is hot enough that a little piece of crushed cracker sizzles when you toss it in, add the chicken strips. Cook on one side until golden brown, then turn the strips with a fork and cook on the other side, about 4 minutes on each side. I always cut one of the fatter ones open at this point to make sure they're cooked through but I haven't had a problem with them being under done. When the chicken strips are cooked, remove them to a paper towel lined plate and let drain for a minute or two. Serve with your favorite dipping sauce. We like barbecue sauce!

Yield: 2-3 servings

Monday, October 24, 2011

Fudge Icing

For a teaching with technology class I'm in I had to create a survey for my classmates to fill out. Unsurprisingly, I picked desserts for my topic and promised to bring in the class's favorite dessert. The options were cookies, ice cream, cupcakes, pie and brownies. Then they were to pick their favorite type of each dessert (ex: peanut butter cookies, snickerdoodles, chocolate chip cookes, etc). Brownies ended up winning (I was the only one who picked cupcakes!) and fudge iced brownies were the preferred type of brownie, so that's what I brought in to class today!

To be honest, I just used a big box of brownie mix for the brownies. It's the one baked good that to me without fail tastes better from a box than homemade. I did make this delicious fudge icing myself though, from this recipe. It's perfect! Easy to make, delicious, soft but not runny, creamy, glossy, chocolaty... YUM! The recipe says it's for brownies and it was perfect on them, but I think it would also be great on a cake baked in a 9 by 13 pan. I don't suggest trying to use it for a layer cake though because it's really runny at first and you'd probably either end up with a big mess or icing that's set up too much to spread.

Quick Note: Boil the icing for exactly 30 seconds and start counting once the mixture has reached a rolling boil. If you start earlier it will be too soft. Also be sure to pour it over the brownies or cake right after you take it out of the oven because some reviewers complained about the icing separating from the brownies or cake otherwise.

Sorry about the ugly picture, there weren't a lot of brownie survivors left to photograph. They went over quite well with my class and several other students and the teacher brought in cookies when they heard I was bringing brownies.


Fudge Icing

1 1/2 C sugar
6 T butter
6 T milk
1 C chocolate chips
1 t vanilla extract

Combine sugar, butter and milk in a small sauce pan and heat over medium-high, stirring with a wooden spoon frequently at first and constantly once it starts to simmer. Once the mixture comes to a rolling boil, let it cook for exactly 30 seconds while you stir. Remove from the heat, let it cool until it stops boiling, then stir in the chocolate chips and vanilla extract until smooth. Pour over still piping hot 9 by 13 pan of brownies or cake and spread to cover. Let set for several hours before serving.

Yield: Depends on how big you like your brownies or cake!

Wrapped Hot Dogs

My sophomore year of high school I was a foreign exchange student in Austria. The family I lived with was wonderful and the daughter is still my closest friend. She flew from Austria to Alaska to be in my wedding last year. My host mother (who is still one of my all time favorite people) made these frequently. Quick fact: In Austria they call hot dogs Frankfurters and another small sausage Wieners. In Germany, they call the hot dogs Wieners and the small sausages Frankfurters :D I always thought that was funny!

Anyway, my recipe for pizza dough makes enough for 2 pizzas so I often leave the extra dough in the fridge for a day or two and then make these. The dough is great after being in the fridge, it ages and the texture becomes chewier and more flavorful. You could make these with fresh dough too though. My host mother always topped them with cheese and caraway seeds. I'm not a big fan of caraway but feel free to include it!

Quick Note: You could easily make these into adorable mummy dogs for Halloween by leaving a gap in the dough at one end and then dabbing on mustard eyes when they come out of the oven, like this. I kinda meant to do that and made one of the hot dogs with a face peeking out, but... there was an "incident"... and that hot dog is no longer available to be photographed :D


Wrapped Hot Dogs

pizza dough, prepared according to recipe through first rise
hot dogs
grated cheese (optional)
caraway seeds (optional)

Preheat oven to 350 and line a baking sheet with parchment paper or greased aluminum foil. Dry off the hot dogs. Divide the dough into balls about 2 inches across and, one at a time, roll the dough into a snake about 16 inches long. Flatten the snake slightly and wrap around the hotdog, pressing the seams to seal so the hot dog is completely encased. Repeat with the remaining dough and hot dogs. Sprinkle with grated cheese and caraway seeds if desired. Bake until golden, 15 to 20 minutes.

Yield: Depends on how much pizza dough you use! A full batch will get you about 12 hot dogs.

Serpentine Stromboli

I love holidays and Halloween is especially fun. Today marks the beginning of several spooky Halloween recipes that I'll share. A couple of weeks ago I ran across the idea for this snake stromboli and thought it was so cute! I used my favorite pizza dough recipe from Our Best Bites and filled the snake with pesto, cheese, pepperoni and olives. It turned out adorable and VERY tasty!

My very favorite pesto is from DeLaurenti Specialty Food and Wine at the Pike Place Market in Seattle. To me it has the perfect blend of flavors and perfect texture. We like it so much that when I go visit my family, we bring home a couple large containers of it, divide it into smaller containers, and keep it in the freezer. How much pesto you use in this recipe will really depend on how strong your pesto is. I used about half a cup in mine but if you have a really strong pesto you may only use 3 or 4 tablespoons. My stromboli split open as it was baking and some oil from the pesto leaked out. This didn't bother me at all (it looked like he had a green belly!) but you could leave out the pesto entirely and dip the slices in pizza sauce if you'd prefer.

This snake was so yummy that I'm definitely going to make it other times of the year just baked as a log.

Serpentine Stromboli

For the dough:

1 1/2 C warm water
1 T sugar
1 packet yeast
1/2 t salt
about 4 C flour

Stir together warm water, sugar and yeast in bowl of electric mixer and let sit until yeast blooms (10 minutes). Stir in salt and 3 C flour by hand. Place bowl on electric mixer with dough hook and add 1/2 C flour. Knead on the lowest or second lowest speed and add flour a couple of tablespoons at a time, mixing well after each addition, until the dough is only slightly sticky. It should feel like a wad of chewing gum (gross description, but accurate!). Pour about a teaspoon of oil over the ball of dough, spread the oil with your fingers, and turn the dough and spread the oil over the other side too. Cover with a dish towel. Place the bowl in a warm place to rise for 30 minutes or until the dough has doubled in size. I've found the perfect place for dough to rise is in my oven. I set the temperature to 300 and let the oven heat for 45 seconds, turn it off, then put in the bowl of dough. You may need to tweak the temperature and time slightly.

For the stromboli:

pesto sauce
1-2 C shredded mozzarella
sliced pepperoni, 1 reserved
1 small can sliced olives, 2 reserved
garlic bread seasoning (optional)
1 egg white
food coloring

Once the dough has risen, grease a large cookie sheet and punch the dough down. Cut off 1/3 of the dough and refrigerate it for another use the next day (this is what I did), or you could make an extra large stromboli. On the cookie sheet, pat the dough out into a 12 by 15 inch rectangle (make it longer if you used the full amount of dough). Spread to within 1 inch of the edges the desired amount of pesto sauce, then top with cheese, sliced olives and pepperoni. Sprinkle with a little bit of garlic bread seasoning if desired. Roll the dough up like a cinnamon roll, starting on a long side. Press edges to seal as best you can and arrange the stromboli into a snake shape on the cookie sheet, seam side down, or you can just leave it as a log and have a regular stromboli. Press the ends to seal and tuck them under. Make one end pointy to look like a tail and one end rounded to look like a head.

In a small bowl, beat the egg white and food coloring of your choice with a fork. Brush the egg white on the snake in whatever pattern you desire. Bake at 350 for about 25 minutes or until snake is slightly golden. While snake is baking, cut the reserved pepperoni slice so it looks like a snake tongue. After you remove the snake from the oven, place the tongue under the snake's head so it sticks out and place the olive slices to look like eyes. Let the snake cool for 5 minutes before cutting into 1 inch slices to serve.

Yield: 4-6 servings (more if you make a big snake)

Sunday, October 23, 2011

Granola

A friend of mine shared this recipe for granola with me the other day and I made a half batch tonight. I had to make some alterations based on what I had but it turned out great! It isn't as sweet as regular store bought granola but sweet enough and the light molasses flavor is a great touch. Also some granola forms little clumps when it's baked but this one doesn't. I actually prefer it this way because it's easier to eat! For the nuts I used some pistachios, cashews and almonds that I had, and the fruit was just golden raisins. In any case, it's definitely the best granola I've made. When you make it, feel free to customize it however you want (maybe add flax seeds, sunflower seeds, pumpkin seeds, wheat bran, even mini chocolate chips once it's cooled if you feel so inclined), just keep the amount of dry ingredients pretty much the same.

Quick note: I bought the sesame seeds and unsweetened dried coconut (which is chopped finely) from the bulk bins at the store. It's MUCH cheaper that way- each was only $3 a pound. Also, when the granola is still in the oven it's going to seem soft still even if it's cooked enough. What I do is put a little scoop of it into a bowl and let it cool (this will only take about 5 minutes). If it's crunchy enough, take the whole pan out of the oven. If not, just cook another 15 minutes!


Granola

5 C oats
1 C nuts, roughly chopped
1 C wheat germ
4 oz dried coconut
1/2 C sesame seeds
1/2 C brown sugar
3/4 C water
1/3 plus 1 T vegetable oil
1/4 C honey
1/4 C molasses
1 t cinnamon
3/4 t salt
1 1/2 t vanilla extract
1 1/2 C dried fruit

Preheat oven to 300 and line a 13 by 18 jelly roll pan with parchment paper. Stir together oats, nuts, wheat germ, coconut and sesame seeds. In a small saucepan stir together water, oil, honey, molasses, cinnamon and salt. Heat while stirring until sugar dissolves (do not boil). Pour over dry ingredients and stir thoroughly to combine. Spread evenly in pan and bake, stirring every 15 minutes, until granola is golden and crisp. This will take about 1 hour. Let cool and then stir in dried fruit. Store in a covered container for up to 6 months.

Yield: about 20 servings

Friday, October 21, 2011

Blueberry Buckle

This afternoon I whipped up my very first Blueberry Buckle! The name is adorable and it looked yummy so I had to try it. Got the recipe from AllRecipes. For once I made no changes, other than to bake it in a pie pan because I didn't have the 9 by 9 pan the recipe calls for. Okay and I also streamlined the assembly a bit. The resulting... thing... is wonderful, the bread part is perfect and the topping is to die for. Is it a cake? Is it for breakfast or dessert? Is it a giant muffin? I'm not really sure, but I DO know it's delicious and you should try it too!

Note: The batter is very thick and almost more like a dough. If you use frozen blueberries I suggest letting them thaw first. I didn't do this and it was a real bear getting them stirred in!


Blueberry Buckle

1/4 C butter, softened
3/4 C sugar
1 egg
1/2 C milk
2 C flour
2 t baking powder
1/4 t salt
2 C blueberries

Topping:
2/3 C sugar
1/2 C flour
1/2 t cinnamon
1/3 C cold butter, cut into half inch cubes

Preheat the oven to 375 and grease a deep dish pie plate or 9 by 9 baking dish. In a medium mixing bowl, stir together butter, sugar and egg. Pour in milk and add flour, baking powder and salt. Stir just until everything is combined, then gently fold in the blueberries. Spread the batter (will be very thick) into the prepared dish. To make the topping, stir together the sugar, flour and cinnamon. Cut in the cold butter with a pastry blender or else use your fingers to rub the butter and dry ingredients together until you have pea sized pieces of topping. Sprinkle over the batter and bake about 40 minutes or until a knife inserted into the center comes out clean.

Yield: 8 servings

Thursday, October 20, 2011

Pizza Spaghetti Lasagna

First of all, let me apologize for the lack of recipes this past week! I'm not losing interest in sharing my recipes, I just haven't made anything worth sharing. We had leftovers, things out of the freezer, we went to a Thai restaurant, and I made teriyaki chicken legs using a bottle of teriyaki sauce I found in the pantry that was about to expire. I did actually consider sharing it but chicken + bottle of sauce is hardly a recipe and I have a great teriyaki chicken recipe with homemade sauce that I'd rather share later.

As I mentioned before, if I ask my husband what he wants for dinner when I'm making up my weekly meal plans, without fail he says he wants casserole. If I ask him what kind of casserole, he says he wants this one. It's adapted from this recipe but we call it Pizza Spaghetti Lasagna. Clunky for sure and I've TRIED to change the name without success, but Pizza Spaghetti Lasagna sums it up perfectly. It has our favorite pizza toppings and pizza sauce, spaghetti, and is baked like a lasagna. Italians would probably be horrified by this travesty and for that I apologize! We aren't Italian thought and we love it. I first tried the recipe 4 1/2 years ago and I've probably made it 15 times since then (that's a lot for me!). The recipe looked so odd that I just had to try it and I've altered it some over the years.

Be warned: this is is a particularly unattractive casserole and I'm almost a little bit embarrassed to share it. When you mix up everything in the pot and see how runny it is, you're probably going to doubt me pretty hard and wonder if you're going to end up with PBJs for dinner, but trust me. Just stir everything up and bake it and it will turn out fine! The noodles absorb the extra liquid and it ends up creamy, noodly, tomatoey, pizza-y, spaghetti-y and lasagna-y.

Quick note: For this particular version I used spaghetti sauce from the freezer and added some more spices, but I usually use my pizza sauce. If you go the pizza sauce route, you can triple the recipe and either use 1/2 cup for something else or just add it all in. It will be fine. You can also substitute your favorite pizza toppings instead of the pepperoni, mushrooms and olives. The casserole freezes well too so you can freeze half in a Ziploc bag before you bake it, then thaw, pour into a greased 8 by 8 pan, sprinkle with a cup of cheese, and bake half an our or so.

Behold, my culinary delight:


Pizza Spaghetti Lasagna

1/2 lb spaghetti noodles, broken into quarters
1/4 to 1/2 lb sliced pepperoni, cut into quarters
1/2 lb sliced mushrooms
1 small can sliced olives, drained
1 can cream of chicken soup
2 C milk
2 1/2 C pizza sauce
1/2 t salt
2 C shredded cheese

Preheat oven to 350 and grease a 9 by 13 baking dish. Cook spaghetti in salted water until al dente. Drain. Saute pepperoni in skillet until crisp and remove to a plate (this will only take a couple of minutes). Saute the mushrooms in the grease left in the skillet (you may need to add olive oil if you used turkey pepperoni). Add to pot with drained spaghetti and all other ingredients except cheese. Spoon into prepared dish, sprinkle with cheese, and bake in preheated oven for 40 minutes or until cheese is golden and casserole is bubbly.

Yield: 8 servings

Friday, October 14, 2011

Molasses Lace Cookies

This is what my mom calls an heirloom recipe. It's been in the family for ages and the recipe that I have for it is a photocopy of an index card that was handwritten by my mother back in the 1960s and had to copy down a handful of her favorite recipes to bring to her middle school and make in Home Ec. I think they're a favorite of pretty much everyone in the family! They were my uncle's all time favorite and he and my grandma both died 6 years ago so I think of them when I make them.

These cookies definitely earned their title as a family favorite. They're spicy with cinnamon, ginger and cloves and have lots of molasses flavor but aren't overwhelming. They're a little crunchy around the edges but soft in the middle and the perfect thickness: not too thin, not too thick. They also stay delicious for at least a week (I think it's the molasses) so are ideal for a cookie jar or to mail to someone. I hope you make them and love them too!


Molasses Lace Cookies


1 C shortening
1 C white sugar
1/4 C molasses (spray the measuring cup with no stick spray first so it comes out easily)
1 egg
2 C flour
2 t baking soda
1 t cinnamon
1/2 t cloves
1/2 t ginger
1/2 t salt

3 T sugar to roll them in

Preheat oven to 375 and line 2 large cookie sheets with parchment paper. Cream together the shortening, sugar, molasses and egg. Add the remaining ingredients (except the extra sugar!) all at once and mix until everything is combined. Pour the 3 tablespoons of extra sugar in a small bowl. Roll the dough into 1 inch balls and then roll in the sugar before arranging 2 inches apart on the cookie sheets. Bake until edges darken just a tad and the center is set, about 10-12 minutes. Let cool and enjoy!

Yield: 24 cookies

Thursday, October 13, 2011

Beef and Bean Burritos

I had never actually made beef and bean burritos until I stumbled upon this recipe over at The Pioneer Woman blog about a year ago. It looked so simple and quick that I had to try it! As usual, I changed it around a bit to make the recipe even more straightforward and to suit our tastes. Of course, it doesn't matter HOW easy a recipe is if it doesn't actually taste good, but I'm happy to report that this one is a winner. Uncomplicated but delicious, my husband especially likes them.  You can either enjoy them as they are (in which case they are highly portable) or lay them on a plate and spiff them up with more El Pato sauce, salsa, guacamole, sour cream, cilantro- whatever floats your boat!

I should also say that most of my favorite dinner recipes I don't make more than once a year at best. Not because I don't like them (obviously) but because I love trying new recipes! This is one of those things that I've made at least four times in the past year.

The key ingredient in these burritos is the El Pato tomato sauce. I'd never tried it before this recipe but it's great! It's quite spicy and has tomatoes, chiles, garlic and onion. You can find it in the Mexican food aisle at the grocery store. I'd imagine if we have it here in Alaska, if you're in the United States you'll be able to find it too :) If you can't get it, you could probably just use an 8 oz can of tomato sauce and add a boatload of hot sauce and garlic to it, but no guarantees on how the burritos will turn out! This is what you want to look for at the store:


I'd like to note that these burritos freeze great, too. Just cool them in the fridge completely, then individually wrap each burrito in foil and toss in the freezer.  Remove the foil (obviously) then microwave on a plate for a couple of minutes.  If you thought far enough ahead, you can also thaw the burritos in the fridge, then bake (still wrapped in foil) for 20 minutes in a 350 degree oven.

Many apologies for this exceptionally uninspiring photo, my husband was eating them as I made them and I had to take a picture quickly before they all disappeared:


Beef and Bean Burritos

1 lb ground beef (or ground chicken or turkey)
2 16 oz cans refried beans
1 8 oz can El Pato sauce (the yellow one)
1 t garlic powder
1 t onion powder
1/2 t oregano
1/2-1 t salt (this will depend on how salty your beans are and your own tastes)
1 lb shredded cheese
12 medium (8 inch) flour tortillas

Brown the ground beef in a skillet and add beans, sauce, and seasonings. Heat through. Put a spoonful of the filling down the center of a tortilla. Top with about a quarter cup of the cheese and fold in the ends of the tortilla before rolling it up. Repeat with the other tortillas.

You can either enjoy them as they are (in which case they are highly portable) or lay them on a plate and spiff them up with more El Pato sauce, cheese, salsa, guacamole, sour cream, sliced olives, cilantro- whatever floats your boat!

Yield: 12 burritos

Buttermilk Cheddar Chive Bread

Whoops, I thought I posted this recipe a couple of days ago! I had the whole thing all typed up but didn't post it. Sorry about the lack of recipes the past couple of days. We've been having things that aren't worth sharing on the blog! For instance, I tried a new recipe for swiss and broccoli pasta but it wasn't that great and I don't want to share recipes that aren't really good.

When I was 10 years old, my grandparents came to visit us and for dinner one night we went to the house of one of their old friends. It was a very memorable meal for a picky kid like me because it was so GOOD. She served some kind of chicken with cranberries (my mom told me how to make it when I talked to her the other day so that recipe should be coming soon!), as well as cheddar bread. That bread was amazing! It was a tiny bit sweet and tender and studded with cheddar cheese. I've tried to replicate the bread a few times over the years but was never successful- until now, that is!

Much to my surprise, the bread recipe that I made up this afternoon completely hit the nail on the head. It was more or less an accident, too. When I made biscuits earlier to use up leftover buttermilk, I accidentally used leftover whipping cream instead of buttermilk! Hey, the containers are both yellow and the same size and shape. So much for that! I didn't want to waste the buttermilk though so just kinda made up this bread. Thankfully, it turned out perfectly :D Even better than the original really because of the flavor from the chives!

Quick note: The dough doesn't rise as much as other bread recipes. Don't worry. I'm not sure if it has something to do with the buttermilk or because of the chives (onion, garlic and salt all inhibit yeast growth), but the finished bread is great so don't worry about it! And if you don't have a mixer, just do all the kneading by hand. You may want to knead it for a couple more minutes.

Also, to make a warm spot for my dough to rise, I always do the same thing. Turn the oven to 300 degrees for 45 seconds, then turn it off. For my oven at least, that makes a perfectly warm place for the dough to do its thang.

See the cheese pockets? Mmmm!


Buttermilk Cheddar Chive Bread

3 C flour
3 T sugar
1 1/2 t salt
1 1/2 T dried chives
1 packet yeast (2 1/4 t)
1/2 C butter
1/2 C buttermilk (plus a bit more!)
1/4 lb cheddar, cut into 1/4 inch cubes

Melt the butter and set aside so it can cool for a couple of minutes. Stir together flour, sugar, salt, chives and yeast in the bowl of a stand mixer. Stir the 1/2 C buttermilk into the melted butter and then stir into the dry ingredients. Attach the dough hook to the stand mixer and knead until all the ingredients are incorporated, adding more buttermilk (probably about 1/4 cup) or flour as necessary to make a non sticky dough. Knead 7-8 minutes on low speed, then knead the cheese in by hand.

Form the dough into a ball and coat with a teaspoon or so of oil. Cover the bowl with a piece of greased plastic wrap and set in a warm place to rise 1 hour. The dough will grow to be only about half again as big as the original size but that's okay. Punch the dough down and place in a greased 9 by 5 inch bread pan. Re-cover with the plastic wrap and let rise 1 more hour in a warm place. The middle of the loaf should reach the top of the pan by this point.

Remove the plastic wrap and bake in a 350 degree oven until the loaf is cooked through (I test it by sticking a toothpick into the center, just like with a cake), about 30-40 minutes. You can cover the loaf with foil if it browns too much. Let the bread cool for a few minutes and then slice and serve warm.

Let the leftover bread cool completely, wrap it in foil, and stick it in the fridge. It will be great toasted for several more days!

Monday, October 10, 2011

Beggagel Breakfast Sandwich

A friend of mine told me about this sandwich several years ago. The silly name is my contribution. I made them shortly after she told me about them and we've been enjoying them ever since! I know it doesn't sound like it would be all that special- just a bagel with cream cheese on it and a fried egg? But it really is great. The flavors and textures are perfect together and it's one of the quickest breakfasts you could possibly make.


Beggagel

1 egg per person
salt and pepper
1 bagel per person
cream cheese

Fry the eggs in a greased skillet until they're as cooked as you'd like. Sprinkle with salt and pepper to taste. While the eggs cook, toast the bagels. Spread cream cheese on one half of each bagel. Top with the fried eggs and the other bagel halves. Enjoy!

Sunday, October 9, 2011

Pumpkin Fluff

I stumbled upon the base recipe for this a few months ago and was intrigued but wanted to use real whipped cream and make a few other changes. Last night we went over to a friend's house and I decided it was my chance! The resulting dip/spread/whatever is very light and fluffy with great pumpkin flavor and a little bit of spice. It reminds me a lot of the filling my mother makes for her Pumpkin Chiffon Pie at Thanksgiving. If you love pumpkin and pumpkin pie, you're bound to like this!

Quick note: If you don't want to use the instant pudding, I'd imagine you could also leave it out and use extra vanilla extract and extra granulated or powdered sugar. No promises on how it would turn out but I don't really see how it could be bad! Maybe a little runnier.

Also, I know it isn't the prettiest thing ever but there are lots of things you could do it make it look nicer. Put it in a pretty bowl or a small hollowed out pumpkin and put it on a nice platter along with carefully arranged apples and cookies.

Pumpkin Fluff

15 oz can pumpkin (not pumpkin pie filling)
3 oz box instant cheesecake pudding mix
1/2 C powdered sugar
1 1/2 t cinnamon
1/2 t ginger
1/8 t nutmeg
1 t vanilla extract
1 1/2 C whipping cream

In a medium mixing bowl, stir together everything except whipping cream until well combined. In a separate bowl, use an electric mixer to whip the cream. Start it on a medium low setting until the cream begins to thicken, then raise the speed and beat until it's reached the consistency of whipped cream. Be careful not to over beat or you'll have butter! Gently fold the whipped cream into the pumpkin mixture until no streaks remain. Refrigerate for an hour or two if possible. Serve with sliced apples and cinnamon graham crackers, gingersnaps, or homemade molasses cookies.

Yield: About 5 cups

Baking Powder Biscuits

As promised earlier, here is a great recipe that uses buttermilk! You can actually use regular milk too, or a combination. Whatever you have. I'm willing to bet it would turn out okay with water too but I'd stick to some form of milk if you have it on hand. The base recipe is from here but, as usual, I make some changes. The most significant change is in how the biscuits are formed. With biscuit dough, you want to handle it as little as possible or the biscuits will be tough and flat. To avoid over handling the dough (and to avoid getting the table, rolling pin and a glass dirty), I've always just formed the dough into little balls instead of rolling it out. It works out great! If you follow the directions exactly, you'll end up with perfect, fluffy, yummy biscuits that can't be beat.

Quick note: Just like you can use regular milk or buttermilk, you can use shortening or butter (cold or room temperature) for the fat or a combination. I've made these biscuits many times and done them all the possible ways. They always turn out perfectly. You could also brush melted butter on them after removing them from the oven if the urge strikes you.


Baking Powder Biscuits

2 C flour
1 T sugar
1 T baking powder
1 t salt
1/3 C shortening or butter
at least 1/2 C buttermilk or milk

Preheat your oven to 425 and grease a round cake pan. In a medium mixing bowl, stir together flour, sugar, baking powder and sat. Cut the shortening or butter into pieces (about 8) and add it to the flour mixture. Use your hand to crumble the fat into the dry stuff until the mixture looks like coarse cornmeal. Stir in the milk with a spoon. Add a little bit more until you have a dough that is just a tiny bit wet. Just stir until it's combined and be careful not to over mix! If you put in too much milk you can add flour a tablespoon at a time to fix it, but it's best to just not add too much milk to begin with. Once your dough is ready, gently form it into 8 balls and flatten them slightly so they're 1 inch thick. Arrange in the cake pan. Bake 15 minutes or until the tops of the biscuits are golden.

Yield: 8 biscuits

Wednesday, October 5, 2011

Mint Orzo Salad

The other night when I cooked orzo to go with my Zucchini Patties, I just cooked the entire 1 pound bag. We ate it for 2 meals and then I used the rest in this yummy, refreshing salad that's perfect for lunch. I saw the recipe on AllRecipes and knew it was something I would love because it has 4 of my favorite things: pasta, lemon, mint and most of all... PEAS! I am a lifelong lover of peas. Only fresh or frozen though, canned ones are evil. Story time: when I was in second grade I wrote and illustrated a short story that was published through the school. There was an "about the author" section and much to the surprise of many kids (and adults) who read it, my two favorite foods were listed as macaroni and cheese and peas. The lady who typed up the page even put several exclamation points in parentheses after it. I'm well aware that many people hate peas for some reason, but I am definitely not one of them!

Quick note: You definitely want to mince the mint leaves finely for this one. If you don't, the salad will have a distinct... leafy quality to it. Ahem.

Mint Orzo Salad

3 C cooked orzo
1 1/2 C frozen peas, thawed
5 fresh mint leaves, minced finely (or to taste)
2 T lemon juice
1 T olive oil
3/4 t salt
1/4 t onion powder or 1/4 C sliced green onion
sprinkle black pepper

Combine everything in a bowl and serve cold.

Yield: 3-4 servings

Tuesday, October 4, 2011

Zucchini Rice Casserole

This recipe is my spin on Spicy Mexican Style Zucchini Casserole from AllRecipes. It turned out really, really well in my opinion! The funny thing is that I used a lot more rice than the recipe called for but my husband still thought it needed more. He loves rice though and would just as soon eat a big bowl of rice with nothing else for dinner every night :)

Quick note: I use Spice Island chili powder. There are a few herbs and spices that we use a lot of so buy in the jumbo container from Sam's. It's about $5 for a big container. I really like Spice Island chili powder but all brands are different since chili powder is a blend of spices. Spice Island chili powder is pretty spicy and seems to have a lot of cumin in it so I didn't add any pepper to the dish and used just a little cumin. The 2 teaspoons in the recipe may be too much or not enough depending on what kind you have.

Also to make this recipe more efficient, I suggest using either leftover rice or cooking enough rice for you to have with another meal. I plan to make Japanese Zucchini and Onions the day after tomorrow so will use the rest of the rice I cooked then.


Zucchini Rice Casserole

1 lb zucchini, cut into 1/2 inch thick half moons
2 T olive oil
1 can pinto beans, drained
16 oz can tomato sauce
2 C cooked rice
2 t chili powder
1/2 t cumin
1/2 t onion powder
1/2 t garlic powder
1/2 t oregano
1/2 t salt
1 C shredded cheese (cheddar, pepper jack, whatever)

Preheat oven to 350 and grease a 2 quart baking dish. In a large skillet, saute the zucchini in the olive oil over medium-high heat until tender. This will take 5-10 minutes. Stir in the remaining ingredients except the cheese. Spread the mixture into the prepared baking dish and top with the cheese. Bake 20 minutes or until cheese is melted and casserole is bubbly.

Yield: 6 servings

Pineapple Zucchini Bread

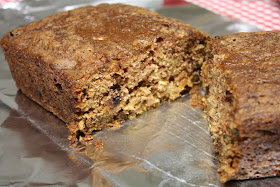
I'd never had, much less made, zucchini bread until last night when I made this. It turned out wonderfully though! We liked it hot from the oven and I had some for breakfast and as a snack later on. When I make other quick breads it tends to languish for a long time until we finally finish it but the first loaf is already half gone after one day in a house with two people. Usually we're not big fans of "things" in our bread but the pineapple and raisins are good. I like golden raisins a lot more than regular ones because they taste better to me but you can use regular ones and add in a cup of nuts if you feel so inclined. Before I made it (altered from this recipe) I was concerned there'd be too much going on what with the zucchini, pineapple, raisins and cinnamon- why not add in coconut and chocolate chips while we're at it?- but it's very yummy with great flavor and texture. The original plan was to give one of the loaves away but I cut the second one in half and froze it so we can enjoy it ourselves later ~muahaha~

A note on preparation: The original recipe says to mix the wet ingredients and dry ingredients separately, then to mix them together and stir in the raisins. I pondered that for a couple seconds and then just stirred it all up. Maybe the bread would have risen more if I'd done everything separately, but I can't imagine it turning out any better than it did! The original also had some cockamamie method for preparing the loaf pans and removing the bread. I skipped that completely and just greased nonstick pans and the bread came out fine after cooling in the pans.

I do have to admit that I accidentally left out one of the eggs. The recipe called for 3 and I only used 2. You can go either way. My bread ended up more cakelike in texture. You'd have a hard time holding a slice of it in your hand and eating it. The third egg may give it a more bread like texture. We like it a lot the way it turned out (who doesn't like cake?) but next time I'll toss in the extra egg to see what happens!

Behold the ugliest delicious bread ever:


Pineapple Zucchini Bread

2 C grated zucchini, squeezed dry (measure after squeezing!)
8 oz can crushed pineapple, drained
2 C sugar
1 C vegetable oil
2 eggs
1 t vanilla extract
3 C flour
1 C golden raisins
1 T cinnamon
2 t baking soda
1 t salt
1/4 t baking powder

Preheat oven to 325 and grease two nonstick 9 by 5 loaf pans. In a large mixing bowl, stir together the first 6 ingredients until well combined. Add remaining ingredients and stir just until it comes together. Do not over mix! Divide batter between the two prepared pans and bake until a toothpick inserted into the middle of the loaves comes out clean, about 1 hour. Cover with foil partway through baking time if the loaves are getting too brown.
Remove from oven and allow bread to cool in the pans.


Ranch Dressing

This ranch dressing is incredible and without a doubt better than any ranch you can buy. We used to buy the refrigerated kind even though it was more expensive than the regular kind because it tasted a lot better, but this is even better and cheaper! It doesn't even have to sit in the fridge for the flavors to blend. I got it from one of my favorite cooking blogs, Our Best Bites. For once I didn't alter a single thing in the recipe because it's perfect as is! We use it as salad dressing of course but more often than that we dip raw veggies in it, especially raw zucchini and whole sugar snap peas this past summer. I was surprised to learn that a lot of people think raw zucchini sounds gross. It's actually really good and you should try it if you haven't yet.

The original post says you can make this into dip by using sour cream instead of buttermilk. I haven't done that yet so can't vouch for it but thought I'd toss it out there! Also if your dressing turns out too thin (it should not if you measure properly), just stir in a little more mayonnaise.

Quick note: Often you can make a buttermilk substitute by stirring together milk and lemon juice, but I do not recommend trying that with this recipe. Just buy a little carton of buttermilk. You can use the leftovers in lots of recipes. Later this week I will post a recipe for biscuits or pancakes or whatever I decide to do with the leftovers. Embrace the buttermilk!

When I visited my family in Seattle this summer, my mom and I went to Crate and Barrel and I found this fantastic little bitty pitcher that's perfect for homemade salad dressing or syrup. It doesn't fall over easily (unlike other dressing containers I've tried), has a lid to keep out gross flavors, and is cute.


Ranch Dressing

1C mayo
2/3 C buttermilk
1 1/2 t dried chives
1 t dried parsley
1/4 t seasoned salt
1/4 t garlic powder
1/4 t onion powder
1/8 t dried dill
1/8 t black pepper
1/8 t dry mustard
1/4 t white vinegar

Stir together all ingredients in a bowl. It will stay good refrigerated for 1 week if your buttermilk is fresh.

Yield: 1 2/3 cups

Zucchini Patties

My little garden is officially done for the year. Here are the last of my tomatoes, I think they're so pretty:

But I'm not sharing any tomato recipes right now. We're eating the red ones raw and the green ones are going in the freezer. But prepare for zucchini week, my friends! Yesterday my mother-in-law and I saved the last of my zucchini from the threat of frost. Here's what we got:


That's 6 pounds! I insisted that my mother-in-law take one of the smaller ones home with her but we still have a lot to use on our own before it goes bad. This summer I didn't cook a single thing that came from my garden (except green tomatoes) because everything was so good raw, but this is a lot of zucchini for two people so simply nibbling on it raw isn't going to cut it. To kick off the zucchini extravaganza, I made zucchini patties. They turned out quite yummy. Very cheesy and the zucchini flavor is mild so they'd be great if you're burned out on zucchini or cooking for someone who doesn't usually like it. We had ours with pizza sauce, buttered orzo, raw zucchini with ranch, and the last of the red tomatoes on the side and it was a pretty fun dinner for some reason.

The zucchini patties are my version of this recipe from AllRecipes.


Zucchini Patties

2 C grated zucchini, squeezed dry (measure after squeezing!)
1/2 C freshly grated parmesan
1/2 C grated mozzarella
2 eggs
1/3 C Italian seasoned breadcrumbs
3 T flour
1/2 t salt
1/4 t pepper
1/4 t garlic powder
1/4 t onion powder
olive oil

Stir together everything but the olive oil. Grease a large nonstick skillet with a couple tablespoons of olive oil and heat over medium. When the skillet is hot, make 4 mounds of the zucchini mixture and flatten to about 1/2 inch thick. Cook until browned, about 3-4 minutes, then flip and cook on the other side. Serve with pizza sauce or sour cream.

Yield: 4 servings

Pizza Sauce

I've tried several pizza sauce recipes over the years and like this one the best, which I made up. It's very simple but yummy and doesn't need to be cooked. When I make homemade pizza I don't want to mess around with making a time consuming sauce! It also goes great with other things like breadsticks, zucchini patties, or anything that you need a side of pizza or marinara sauce for. I like Hunt's tomato sauce for this because I think it has good flavor but you can use whatever brand you want. You may want to add a little salt if you use another brand.


Pizza Sauce
8 oz can tomato sauce
1/2 t dried basil
1/2 t dried oregano
1/4 t dried rosemary
1/4 t black pepper
1/4 t garlic powder
1/4 t onion powder

If you have one, crush the dried herbs in a mortar and pestle to release the flavors. Stir everything together in a small bowl and use as desired.