Showing posts with label bread. Show all posts

Sunday, September 30, 2018

Whole Grain, High Protein Cheese Muffins

This recipe comes from the blog Ben & Birdy, and she in turn got it from The Pioneer Woman.  For once, I did not change anything about the recipe!  I've had really good luck with recipes from that blog, so don't usually tinker with them excessively.
 
This was my first time using spelt flour.  They also have whole wheat flour.  I like the flavor and texture of whole grains, but believe me when I say they do not taste like they're made with whole grain flours and they are very moist, soft, cheesy, and delicious!  I mean, there's twice as much cheese as flour, how could they not be moist and wonderful?  My husband and I both loved them.
 
These muffins are exceptionally high in protein because whole grain flours have more protein than white and each muffin has a full serving of cheese, which is of course also full of protein.  They also have fewer carbohydrates than most muffins since each muffin only has 2 tablespoons of flour, which is half a serving.  You can either feel very virtuous while you devour your single muffin, or you can take it as your cue to eat a second muffin.  Entirely up to you!
 
Our muffins sadly met with disaster when they were cooling and all but 1 ended up knocked on the floor, but we did enjoy the ones we ate and I can confirm the miracle survivor muffin reheated nicely in the toaster the next day!
 
Whole Grain, High Protein Cheese Muffins
 
1 C spelt flour
1/2 C whole wheat flour
1 1/2 Tbsp sugar
1 Tbsp baking powder
1 tsp salt
1/2 tsp garlic powder
3 C shredded sharp cheddar (this is 3/4 lb- I used bagged cheese)
4 Tbsp butter
1/2 C buttermilk (I just mixed a teaspoon of vinegar with 1/2 C milk and let it sit for a few minutes)
1/2 C regular milk
1 egg
 
Preheat oven to 375 and grease a 12 hole nonstick muffin tin.  These will probably stick badly to tin that is not nonstick!  Set aside.
 
Stir together the dry ingredients, then stir in the grated cheese.
 
Melt the butter in a 2 cup glass measuring cup in the microwave, then add the buttermilk, regular milk, and egg.  Beat with a fork until the egg is well mixed.
 
Pour the wet ingredients into the dry ingredients and stir just until well combined.
 
Divide batter evenly among the muffin tin wells and bake until golden and a toothpick comes out clean, about 17-22 minutes.  These are very moist muffins because of the cheese so the toothpick may be a little wet looking, but clear-wet, not muffin batter-wet.
 
When muffins are done baking, let them sit for 10 minutes or so, then use a plastic knife to gently run a plastic knife around each muffin to loosen them from the tin. 

Yield: 12 biscuits

Wednesday, August 29, 2018

Savory Cornbread

Here's another cornbread recipe!  The other cornbread recipe on my blog is just as good, but the sweet type.  This one has no sugar at all and is a little smoky if you use bacon grease rather than butter.  Unlike a lot of cornbread, this is not dry at all.  It pairs very well with chili or as a topping for any casserole that calls for cornbread batter poured on top since it isn't sweet.  I'll bet it would be very good dried and used for cornbread stuffing as well.
  
This recipe comes from Southern Plate.  My main change is to cut back on the buttermilk by 1/2 a cup, it just turns out too wet when I make it with the 2 C buttermilk described in the original. I also bake it at 350 instead of 450 and use a glass baking dish.  The glass baking dish is because I don't have a cast iron pan, and the lowered temperature is because it bakes much more evenly at the lower temp.
  
I suppose I should add that if you want to get really picky, you should use white cornmeal instead of yellow.  Apparently yellow cornmeal is a no no in southern cooking because livestock typically eat yellow corn.  I, however, like the color of yellow cornmeal better and the brand I like only comes in yellow, so yellow it is.
 
Enjoy!
  
Savory Cornbread
 
1 1/2 C fine cornmeal
3 Tbsp flour
1 tsp baking soda
1 tsp salt
1 1/2 C buttermilk
1 egg
2 Tbsp bacon grease or butter, melted
 
Preheat oven to 350 and grease a 7 by 11 baking dish.  Set aside.
 
Stir together dry ingredients.  Pour in buttermilk and egg, stir to combine, then stir in bacon grease until mixture is smooth.  Pour into prepared baking dish.
 
Bake until golden and a toothpick inserted into the middle comes out clean, about 20 minutes.
  
Yield: 6 large servings

Sunday, April 30, 2017

Whole Wheat Biscuits

This is a really good and basic whole wheat biscuit recipe.  My husband actually made them!  I found the recipe on 100 Days of Real Food and he made them, with some tips shouted from the couch.  Whole wheat baked goods can be finicky, but this recipe resulted in good biscuits- tender, yummy, and moist.  The only things I changed were the amount of salt and the prep method a tiny bit.  
 
I'm renowned for making different versions of the same recipe over and over, but I don't think I'll need to look for another whole wheat biscuit recipe.  One thing I do want to do though is experiment with adding mixins, like cheese, herbs, lots of pepper, citrus zest, or dried fruit.  They're great as is, but don't rosemary parmesan biscuits, or orange blueberry biscuits sound divine, too?
  
 
Whole Wheat Biscuits
 
2 C whole wheat flour
4 tsp baking powder
1 tsp salt
4 Tbsp cold butter, cut into cubes
1 C milk, regular or buttermilk
 
Preheat oven to 450 and line a baking sheet with parchment paper.  Mix together dry ingredients.  Cut in butter until the mixture looks like coarse cornmeal.  Stir in milk.  Add a little more flour or milk if necessary to get a nice, cohesive, not too sticky dough.  Pat dough out into a 3/4 inch thick circle and cut out biscuits with a round cutter or drinking glass.  Squish remaining dough back together and cut out more biscuits.  Arrange on lined baking sheet and bake until golden (you can check the bottoms if it's hard to tell from the top), about 10 to 12 minutes.
 
Yield: 8 biscuits

Wednesday, November 30, 2016

Yellow Cornbread

This is not a southern style cornbread.  I understand that in the south, cornbread is supposed to be made with a) white cornmeal, b) no flour, and c) no sugar.  Occasionally I make the cornbread recipe from Southern Plate, which fits those requirements, but we kind of like this recipe even more.  It's Canadian!  And has flour, sugar, and I like using yellow cornmeal because it's prettier!  My kitchen, my rules, and sometimes we want a sweet, yellow cornbread.

This recipe is originally from AllRecipes and I've been making it for years.  I've tried a lot of cornbread recipes, and this one is pretty perfect: sweet but not too sweet, soft, moist but not too moist, and just generally yummy.  This is a half recipe because a 9 by 13 pan of cornbread is just more than my husband and I can eat before it goes stale.  My one change is to reverse the amounts of cornbread and flour so there's more of the former.  It makes the perfect cornbread and is my go-to recipe.

Yellow Cornbread

1 C yellow cornmeal
1 1/4 C milk
3/4 C flour
1/3 C sugar
1/2 Tbsp baking powder
1/2 tsp salt
1 egg
1/4 C vegetable oil

Preheat oven to 400 and grease an 8 by 8 inch baking dish.

In a large mixing bowl, stir together cornmeal and milk.  Let it sit for 5 minutes.  Add remaining ingredients, and stir until well combined and smooth.  Pour into prepared baking dish.  Bake until golden and a toothpick inserted into the center comes out clean, about 20 to 25 minutes.
 
Yield: About 9 servings.

Sunday, October 16, 2016

Flaky Buttery Biscuits

This recipe is from Martha Stewart and it makes 9 big, fluffy biscuits that were a perfect pair with the apple pie jam I made.  I've only made these biscuits once, but the recipe is good enough to replace my old biscuit recipe.  My only changes were that I didn't need all the milk (no surprise there, since you aren't supposed to just dump in all the milk with any biscuit recipe unless it's drop biscuits), and I chose to make square biscuits.  It's just simpler and faster that way and minimizes how much the dough is handled, but you're welcome to roll the dough out and cut it into rounds if you want.
 
Flaky Buttery Biscuits
  
1 3/4 C flour
2 1/2 tsp baking powder
1 tsp salt
6 Tbsp cold butter
about 3/4 C milk
 
Preheat oven to 450 and line a baking sheet with parchment paper.  Set aside.
 
In a large bowl, stir together flour, baking powder, and salt.  Cut the cold butter into small cubes and immediately add to the dry ingredients.  Use your fingers or a pastry blender to cut the butter into the dry ingredients until it looks like a very coarse cornmeal.  Pour in 1/2 C milk and stir lightly with a fork, just until the dough comes together.  If it's too dry, you can add the rest of the milk a tablespoon or two at a time.  Knead gently just until the dough looks uniform (this should only be 15 seconds or so), be careful not to over work it.  You want a dough that's just a little tacky.  
 
Dump the dough onto the prepared baking sheet and gently form it into a square about 3/4 inch thick.  Use a knife to cut the square into 9 biscuits.  Leave them touching on the baking sheet, and bake until golden, about 13 to 15 minutes.  Serve immediately.
 
Yield: 9 large biscuits

Saturday, September 17, 2016

Nectarine Banana Bread

This is just my regular banana bread with diced nectarines added, but it sure is good, and worthy of its own post!  Wow!  It's so moist, dense (in a good way), and sweet that it's practically cake.  One large loaf has 3 bananas and 3 nectarines in it, so it's full of fruit.  The nice thing is that you can taste both the nectarines and the bananas well.  Banana tends to cover up all other flavors, but because the nectarines are diced and not pureed, they come through great.  In the future, I'd like to try adding fresh raspberries instead of the nectarines and see how that turns out.
 
Nectarine Banana Bread
 
3/4 C softened butter
1 1/2 C sugar
2 eggs
3-4 mashed overripe bananas (you want about 1 1/2 C)
2 C flour
1 tsp baking soda
1/2 tsp salt
1/2 C buttermilk
3 nectarines, peeled and diced
  
Preheat oven to 350and grease a one large bread pan (I use this one) or two normal sized ones.
  
Mix butter and sugar until fluffy, then mix in eggs and bananas.  Add baking soda, salt, and half of the flour to the mixing bowl and beat to combine.  Stir in 1/2 of the buttermilk, then stir in the rest of the flour.  Stir in the last of the buttermilk until everything is well combined.  Stir in diced nectarines.  Spread batter in prepared bread pan and bake until a toothpick inserted into the center comes out clean, about 1 hour for a large loaf, or around 40-50 minutes for two normal loaves.  You can cover the pan with foil if the bread browns too much.  Let baked bread rest for about 20 minutes, then invert it onto a plate to finish cooling. 

Yield: About 12 servings

Thursday, September 1, 2016

Cheesy Bacon Ranch Breakfast Biscuits

On at least one weekend day every week, I make my husband and I a nice breakfast.  More often than not that means pancakes, but I also like making beggagels, waffles, french toast, muffins, omelets, or occasionally a breakfast casserole or something like this.  I found this recipe on a website called Spoon University earlier this week and thought it sounded perfect for a weekend treat.  They're really good and turned out pretty much how I expected them to: Soft, warm, nice smoky crunch from the bacon, cheesy, and just all around yummy.  We had them with fresh plums, and it was a very yummy breakfast that I'll make again.  Conveniently, I only had to buy the biscuit dough because I pretty much always have the other ingredients in my refrigerator already.
 
It occurred to me while we were eating these that there's no reason why they couldn't be served as a side to go with chicken or something at dinner.  I think I just saw bacon and thought of breakfast.  They'll probably stay mostly a breakfast thing for us because they're a bit more caloric and involved than I prefer side dishes to be, but that's just me.  I'll probably make them to go with dinner at some point.  The leftovers will be going with my husband to work for lunch and I'm going to try freezing a couple of them.
 
Pardon the lack of photo.  My camera went to heaven and I don't have a cell phone, so no easy way to take pictures when I made this recipe!
 
Quick Note:  You really have to use the flaky layer biscuits for this, not the plain kind, because the layers make it so you can separate them into halves cleanly.  Make sure the tube of biscuits says "flaky layers" on it.  Also, I just added a sprinkle of dried chives instead of fresh green onions because my green onions were looking floppy and unappealing.
 
Cheesy Bacon Ranch Breakfast Biscuits
 
tube of 8 refrigerated jumbo sized flaky layer biscuits (they must be the flaky layer variety!)
ranch dressing
8 slices of bacon, cooked and crumbled
about 1 C grated cheddar cheese
about 3 Tbsp sliced green onions or 1 1/2 Tbsp sliced fresh chives
 
Preheat oven to 350 (or temperature indicated on package of biscuits) and cover a baking sheet with parchment paper.  Place biscuits an inch or so apart on baking sheet.  Bake until the biscuits just begin to turn golden on top, about 8 minutes.
 
Remove baking sheet from oven and gently pull the top half off each one.  Spread a little ranch dressing on each bottom half, sprinkle with 1/8th of the bacon, a generous sprinkle of shredded cheese, and some green onions or chives.  Replace tops, and sprinkle with a little more cheese.  
 
Bake until nicely golden brown on top, about 5 minutes more.  Remove baking sheet from oven and let biscuits cool for a couple of minutes before serving.
 
Yield: 8 biscuits

Wednesday, July 13, 2016

Cream Scones Two Ways

I've developed a real love of scones.  I never ate them growing up, probably because my mother doesn't care for them and I took her word that they weren't very good.  Honestly, the first time I had a scone (other than one unimpressive grocery store bakery scone) was when I was about 27 and decided to try a recipe.  Since then, I've made several more recipes for scones and have really liked them all.
 
This recipe came about because I wanted to make two different types of scones- savory and sweet- but didn't want to end up with 24 scones for 2 people.  I found a rather neutral scone recipe on the King Arthur Flour website, made it as a base, then divided the dough and added mix ins to each bowl.  Both varieties turned out really nice, and complemented each other well: one with dried cherries, chocolate, and almond extract, and the other with cheddar and a generous amount of black pepper.  I served the scones with scrambled eggs, bacon, and grapes on a Sunday morning, and it was an awesome, rather extravagant seeming breakfast.
 
Quick Note:  The original recipe says to try freezing the scones for 15 minutes before baking because they'll rise even more, but I skipped this part.  Next time I'd like to try it, but the scones turned out really well anyway.  The recipe also said you can sprinkle coarse sugar over the sweet scones before baking.  I didn't have any, so just skipped it, but would like to try it at some point.
   
 
Cream Scones Two Ways
 
For base mixture:
3 C flour
2 Tbsp sugar
1 Tbsp baking powder
1 tsp salt
 
Preheat oven to 400 and line a large cookie sheet with parchment paper.  Mix together in a large bowl.  Scoop 1 1/2 cups plus 1 tablespoon of the mixture into a second mixing bowl.
 
For Cherry Chocolate Almond Scones:
 
3 Tbsp sugar
1/3 C dried cherries
1/3 C milk chocolate chips
about 1 C cream (may need more or less)
1 tsp almond extract
 
Into one of the bowls of base scone mixture, stir the 3 Tbsp extra sugar.  Stir in cherries and chocolate chips.  Measure out 3/4 C cream and stir the almond extract into it, drizzle over flour mixture.  Gently toss and stir dough together, adding a little more cream if needed so you have a soft, not too sticky dough.  You may need to use your hands.  Be sure to combine the dough just enough so it comes together, form into a ball.  Set dough aside.
 
For Peppery Cheddar Scones:
 
3/4 tsp black pepper
1/2 C sharp cheddar cheese, cut into small cubes
 
Into the other bowl of base scone mixture, stir pepper and cheddar.  Measure out 3/4 C cream and drizzle over flour mixture.  Gently toss and stir dough together, adding a little more cream if needed so you have a soft, not too sticky dough.  You may need to use your hands.  Be sure to combine the dough just enough so it comes together.
 
Make the dough into a ball and place it off to the side on the parchment paper lined cookie sheet.  Place the other dough ball on the other side of the pan, near the opposite corner.  Pat the dough balls out into 6 inch wide rounds.  Brush with cream, then cut each round into 6 wedges.  Pull the wedges slightly apart from one another.
 
Bake scones in preheated oven until golden on top and they look cooked through on the sides, about 18 minutes.  Let cool on the pans for a few minutes, then pull them gently apart and serve with butter.

Thursday, May 5, 2016

Sour Cream & Onion Biscuits

Ooh, these biscuits are good!  I had some sour cream that needed to be used up and I'm not sure WHY I googled "sour cream biscuits", but I did, and here we are.  The base recipe is from Taste of Home, but I added chives and onion powder because sour cream and onion sure go well together.  The biscuits are wonderful.  They're VERY tender and delightful.  You could easily leave out the chives and onion powder if you want them plain.  The dough is also really easy to make, so a good choice if you're a little intimidated by the idea of making biscuits from scratch!
 
This recipe makes 6 nicely sized biscuits.  You could definitely double it if you need more, I'd suggest making 2 circles of dough on your pan instead of just 1.
 
 
Sour Cream & Onion Biscuits
 
1 C flour
1 1/2 tsp baking powder
1/4 tsp baking soda
3/4 tsp salt
4 tsp dried chives
1/2 tsp onion powder
3/4 C sour cream
2 tsp canola oil
 
Preheat oven to 425 and place a square of parchment paper in a round cake pan.  Set aside.
 
Whisk together dry ingredients.  Stir together sour cream and oil, then add to dry ingredients.  Stir just until evenly combined, no longer than that because the biscuits could turn out tough.  You may need to get in there with your hands to mix the dough.  Dough will be very sticky.
 
Transfer dough to the prepared cake pan and use your hand to evenly press the dough into a 3/4 inch thick circle, it will help if you get your hand wet.  Use a knife to cut the dough into 6 triangles, but don't pull them apart.
 
Bake until golden on top, about 15 minutes.  To serve, just pull the biscuits apart.  These are great with butter!
 
Yield: 6 biscuits

Sunday, May 1, 2016

Secret Recipe Club: Rhubarb Bread

It's Secret Recipe Club time again!  This month, I was assigned the blog BCMom's Kitchen.  The blog is written by Anna.  Anna's approach to the recipes she makes seems pretty in line with my own.  She is a chronic recipe tweaker, loves trying out new recipes, only repeats a recipe if it turned out fabulously, and tends to gravitate towards easier recipes.  My kind of cook!
 
Tastiness abounds on Anna's blog.  She has a ton of recipes that appealed strongly to me, and I will probably make more of her recipes in the future.  I was particularly drawn to her varied selection of rhubarb recipes because to my undying joy, winter has finally left Interior Alaska (though last night I dreamed it snowed again) and my rhubarb plants are working overtime.  The stalks are still pretty small, but big enough to sacrifice a few for springtime tastiness!  Both of her rhubarb muffin recipes look great, as does the rhubarb focaccia (so unique, I'll definitely make this one!), rhubarb pudding cake, and blackberry rhubarb crumble.  Yum!  It was a very close tie between the two, but I decided to make rhubarb bread instead of rhubarb muffins.
 
The rhubarb bread turned out great.  I was drawn to it because I'd never actually seen a rhubarb bread recipe, and I liked that rhubarb was the star of the show instead of having to share the title with another fruit.  The soft, tart little bits of rhubarb were really nice and contrasted well with the sweet, cinnamony goodness of the bread.  One of the loaves went to our neighbors who kindly took care of our pets when we went out of town recently (first time leaving my dogs, it was so hard!), but my husband and I got to devour the other loaf ourselves.  Anna has a very intriguing recipe on the bread page for honey rhubarb butter, which I will try another time.  I just purchased a tub of honey brown sugar cinnamon butter at Sam's Club so wanted to use that on the bread.  Great combo!  I also really liked the taste and crunch of the topping, plus how quick and easy it is to make, so plan to use it in other recipes.  How good does pumpkin bread with crumb topping sound?  Yes, please!
   
  
Rhubarb Bread
 
1 egg
1 C brown sugar
1/2 C canola oil
1 tsp vanilla extract
1 C buttermilk
2 1/2 C flour
1 tsp salt
1 tsp baking soda
1 tsp cinnamon
2 C chopped rhubarb
 
for topping:
3 T butter, melted
1/2 C sugar
1/2 C oats
1 tsp cinnamon
  
Preheat oven to 325 and grease two 9 by 5 inch loaf pans.
  
Mix together egg, brown sugar, and oil, then stir in the vanilla extract and buttermilk.  In another bowl, combine flour, salt, baking soda, and cinnamon.  Stir into wet ingredients, then stir in rhubarb.  Divide batter evenly among the two loaf pans.
  
To make the topping, stir brown sugar, oats, and cinnamon into the melted butter, then sprinkle evenly over the loaves.
  
Bake in the preheated oven about 45 minutes, or until a toothpick inserted into the center comes out clean.  Let loaves cool in the pans for 10 minutes, then turn them out onto a cooling rack to finish cooling.
  
Yield: 2 loaves, about 16 servings
  

Tuesday, January 19, 2016

Jamboree Muffins

This is the most recent recipe I've made from Joanne Fluke's murder-mystery series about Hannah Swensen that also focuses a lot on baking.  This recipe is from The Red Velvet Cupcake Murder.  I was lying in bed Saturday night and had decided to make muffins, but didn't have a particular recipe in mind.  10 minutes later, I was reading the book and came upon the recipe for Jamboree Muffins.  I had all the ingredients and they sounded good, so why not?
  
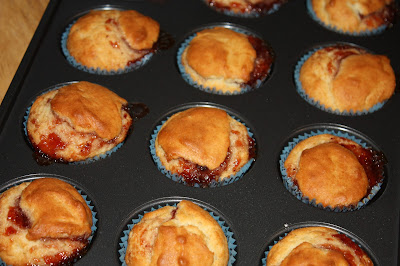
These muffins are GREAT.  Definitely among the best I've ever had.  They're very interesting, too.  The finished muffin is like a cross between a muffin and a biscuit, both in texture and flavor.  When I looked the recipe over the first time, I had my suspicions they'd be rather biscuit-like because the ingredients look more like a biscuit dough than muffin batter, and I was right!  They aren't very sweet and have a texture reminiscent of a buttermilk biscuit, but are rather airy, like a muffin.  The jam in the middle is an awesome addition.  I used strawberry, but pretty much any flavor would be really good.  I've tried making jam filled muffins in the past and they haven't been particularly good to start with, but the leftovers were awful because the jam made them very soggy.  The texture of these muffins is dense enough that they don't get soggy and were still tasty the next day.
  
In the future, I'd like to experiment with making these muffins with other ingredients added instead of jam.  They'd make great dinner biscuit/muffins with green chiles and cheddar added, or any number of other ingredients.  I'll bet they'd even be great left completely plain.  It's such an easy, one bowl recipe, that I'm sure I'll try several variations.
   
   
Jamboree Muffins
    
1 egg
3/4 C milk
1/2 C vegetable oil
1/3 C sugar
1 Tbsp baking powder
1 tsp salt
2 C flour
about 1/3 C jam
   
Preheat oven to 400 and grease a 12 cup muffin pan with oil, or use muffin papers.
   
In a large bowl, beat egg with a fork.  Mix in milk, vegetable oil, and sugar with a spoon until smooth, then stir in baking powder and salt.  Stir in flour and mix thoroughly, but don't worry about lumps.  This is basically a wet biscuit dough, so you don't want to over mix it!
Fill each muffin cup 1/3 full with batter, then top each with a small spoonful of jam.  Divide the remaining batter among the muffin cups.
  
Bake until golden and a toothpick inserted into the middle comes out clean, about 15-20 minutes (mine took 17).
  
Yield: 12 muffins

Wednesday, September 23, 2015

Sally's Banana Bread

Imagine that, a banana bread recipe on my blog!  I have only once in my life eaten a banana bread that I actually enjoyed, and that was about 12 years ago.  Bananas and I are not friends in most instances, and for me, the flavor of baked bananas is even worse than raw.  I decided to make this recipe, though, because I had some bananas to use and have had really good luck with all of the recipes I've made from Joanne Fluke's Hannah Swensen series.  This recipe is called Sally's Banana Bread and is from the book The Sugar Cookie Murder.  I've made at least 5 recipes from just that book so far and we have really liked all of them. 

The banana bread ended up being really good, even though it didn't have any cinnamon.  I had a couple of slices, as did my husband, and the rest of the loaf went to a new neighbor who said she liked it, as well.  It's sweet, moist, and just my idea of the perfect banana bread.  I'm happy to add a second banana recipe to my shelf, in addition to Brown Sugar Banana Cake!

This recipe escaped being photographed because it was eaten up so quickly!  It didn't look different from any other banana bread, though, except that I baked it in this lovely pan.  I love that pan, by the way.  It's great for quick breads and bundt cakes, and so far everything I have baked has come out really easily.

Quick Note:  I cut the salt down to 1/2 tsp from 1 tsp in the original recipe because I used salted butter and thought 1 tsp sounded like too much.

Sally's Banana Bread

3/4 C softened butter
1 1/2 C sugar
2 eggs
3-4 mashed overripe bananas (you want about 1 1/2 C)
2 C flour
1 tsp baking soda
1/2 tsp salt
1/2 C buttermilk
1/2 C chopped walnuts or pecans, optional (I did not add them!)

Preheat oven to 350and grease a bread pan.

Mix butter and sugar until fluffy, then mix in eggs and bananas.  Add baking soda, salt, and half of the flour to the mixing bowl and beat to combine.  Stir in 1/2 of the buttermilk, then stir in the rest of the flour.  Stir in the last of the buttermilk and the nuts (if you're using them) until everything is well combined.  Spread batter in prepared bread pan and bake until a toothpick inserted into the center comes out clean, about 1 hour.  You can cover the pan with foil if the bread browns too much.  Let baked bread rest for about 20 minutes, then invert it onto a plate to finish cooling.

Sunday, May 31, 2015

Secret Recipe Club: 30 Minute Dinner Rolls

This month's SRC recipe comes from the blog Hun... What's for Dinner?, which is written by a very nice sounding young stay-at-home mom of two adorable children.  She is a very busy cook and makes all kinds of things!  I really want to try her Stuffed Savory Ham and Cheese French Toast and Old Fashioned Tomato Noodle Soup (I feel these two would be really good paired together), but ended up choosing her 30 Minute Dinner Rolls.  The idea of rolls in 30 minutes really intrigued me and the picture she posted looked really good, so I gave it a go.

Lucky I did, too, because the rolls are so good!  They're quick, yes, but believe me when I say the quality does not suffer.  They're soft, puffy, and very, very tasty.  I have no idea how they're so good when they take so little effort, but you won't hear me complaining!  The main advantage to these I think is that without all of the kneading and rising, the guesswork of how long it will take to make the rolls is completely gone.  You can't really rush rising dough and it doesn't always cooperate with the other things you're trying to get on the table, but that's not really a problem with this recipe since the times are so predictable.


30 Minute Dinner Rolls

1/4 C sugar
1/3 C vegetable oil
1 C plus 2 Tbsp warm water
2 Tbsp yeast
4 C flour, divided
1/2 tsp salt
1 egg

In the bowl of a stand mixer, stir together sugar, oil, water, and yeast until yeast dissolves.  Let sit for 15 minutes.  The yeast should look creamy and have grown some.

Add 2 C of the flour, the salt, and the egg, then stir it in.  Stir in additional flour in 1/2 C increments until it's too difficult, then attach the dough hook and knead until the dough comes together and looks uniform.  It's okay if it's sticky and don't worry about kneading it past when the dough comes together.

Grease a 9 by 13 baking dish, grease your hands, and then form the dough into 12 equal sized balls and arrange them evenly in the dish.  Place the dish in the oven and let the rolls rise for 10 minutes.  After 10 minutes have passed, turn the oven to 400.  Set your timer for 10 minutes once the oven finishes preheating.  The rolls are done baking when they're golden brown.

Yield: 12 large rolls


Sunday, February 8, 2015

Brown Sugar Oat Scones

Got another great recipe from Catherine Newman's blog, Ben and Birdy.  It's called Brown Sugar Oat Scones!  I've wanted to make this recipe for over a year, and finally did this morning.  I'm not entirely sure why I've been so fascinated with the recipe- maybe because all the recipes I've tried from that blog have turned out amazing?- but the scones were definitely worth the wait!  The only thing I'd change is that I wish I'd made them sooner so we wouldn't have been scone-less all this time.
Let's see if I can describe the scones.  They look very rustic and are sort of pretty in their own way.  They're really brown because of the whole wheat flour and brown sugar.  Just looking, you'd think they have cinnamon in them (maybe an idea for the future?).  They have a very tender, rather crumbly texture to them, and a little bit of sweetness, but not too much.  The whole wheat and oat flavors are very toasty and savory and perfect.  These scones have instantly gained the status of #1 scone in my book!  My husband called them little oat pizzas when he saw them, and he loved them, too.
  
Quick Note: According to Catherine, this recipe is originally from the book Vegetarian Cooking for Everyone by Deborah Madison.  In the original, Deborah says to use cream or milk for the liquid.  Catherine uses half and half in her version, but I happened to have exactly 3/4 C cream in the fridge left over from another recipe, so the perfect amount for the scones plus a tiny treat for the kitties.  I'm sure cream makes for the best texture.  Next time I'll try milk and will update the recipe then!
  
  
Brown Sugar Oat Scones
  
1 C rolled oats (not quick oats, they're too fine), plus more
1 1/2 C whole wheat flour
1/3 C packed brown sugar (I used dark, added some extra flavor)
2 tsp baking powder
3/4 t salt
7 Tbsp cold butter, cut into small pieces (wait to do this until right before you use it)
2/3 C cream (or half and half)
1 egg
1 tsp vanilla extract
  
Preheat oven to 425 and line a baking sheet with parchment paper.
  
Stir together dry ingredients.  Whisk together cream, egg, and vanilla extract in a separate bowl and set aside.

Cut butter into flour mixture either with a pastry blender or just use your fingers to rub the dry ingredients and butter together until the butter is mostly mixed in and the mixture looks very sandy. 
Pour in the cream/egg mixture and stir just until it comes together, being careful not to over mix.  After I stir it a a little bit, I dive in with my hands because it's easier to tell whether the dough is evenly moist that way.  Gently form dough into a ball.
  
Sprinkle about 1/3 C oats on a clean work surface and place the dough ball in the center.  Gently pat it out until you have a circle about 1/2 inch thick.  Cut the dough into 8 wedges and carefully move them to the prepared baking sheet.
  
Bake scones until they begin to turn golden brown, about 15 minutes.
  
Serve with butter, jam, and honey.
 
Yield: 8 scones

Monday, June 2, 2014

Secret Recipe Club: Chicken Shawarma with Pita Bread & Toum

Secret Recipe Club
For this month's Secret Recipe Club, I was assigned the amazing blog of a nice lady named Sawsan who lives in Jordan.  Her blog is called Chef in Disguise and has so many incredible looking recipes!  I had a heck of a time choosing one because food from that region of the world is basically my favorite.  When I saw her recipe for chicken shawarma, I decided to go full out and make that along with her pita bread and toum (creamy garlic sauce) recipes.  This was my first time making any of these things and also the first time I'd had chicken shawarma or toum.

For the purposes of this post, I'm just focusing on the chicken shawarma recipe, but you can find her pita bread here and toum here.  I made the latter two exactly according to her recipes and they turned out great!  The bread was soft and tender, and formed pockets like it was supposed to (something I worried about a bit!), and the toum was extremely creamy, lemony, and garlicky.  They definitely get my recommendation.

The chicken shawarma was very good, too.  It's something I've always wanted to try and ended up being quite unique!  I've never tasted anything with this specific combination of ingredients, but cinnamon, allspice, and cardamom are among my favorite spices and this recipe has all three!  Sadly I did not have the mastic so had to do without, but I will definitely try to get some next time I'm in Seattle and will make this recipe again with it.  The flavors came together quite nicely even without the mastic, though, and my husband and I both are looking forward to the leftovers and making it again another time.  I'm so glad I was assigned Sawsan's blog because these three specific recipes are probably not ones I would have come across otherwise.

Below is my version of Sawsan's recipe.  There were a couple of things I was a little unclear about in the main recipe, so I did it how I thought she intended, but I followed her recipe pretty closely.

Chicken Shawarma

Marinade:
8 oz plain yogurt
juice and zest of 1 lemon
2 cloves garlic, minced
2 Tbsp olive oil
2 Tbsp ketchup
2 Tbsp tahini
1 Tbsp vinegar
1/2 tsp salt
1/2 tsp paprika
1/2 tsp allspice
1/2 tsp mastic (I did not have this)
1/4 tsp cinnamon
1/4 tsp cloves
1/4 tsp cardamom
1/4 tsp ground bay leaf (I put a whole bayleaf in with the marinade)
1/8 tsp nutmeg

Chicken:
3/4 lb boneless, skinless chicken breasts or thighs, cut into strips (I used breasts)
2 Tbsp
1 onion, halved and sliced
2 medium tomatoes, cut into wedges

Extra:
pita bread
sliced pickles
toum or tahini
french fries

Mix together marinade ingredients.  Add chicken and stir to coat.  Refrigerate several hours or over night.

When you're ready to cook, heat 2 Tbsp olive oil in a large skillet over medium high.  Add chicken to skillet with tongs and discard the remaining marinade (some will stick to the chicken).  Saute until chicken is almost cooked through, then push it to one side of the pan and add the onions.  Saute the onions until they soften, about 3-5 minutes, then push them to the side of the pan.  Saute the tomatoes until they begin to soften, about 3-5 minutes more.  Stir everything together and let it simmer for about 5 minutes more, stirring occasionally.

To serve, open up a pita and spread with some toum or tahini.  Make a line of the chicken shawarma mixture down the center of the pita and add sliced pickes and a few french fries if you'd like.  Roll up the pita and serve with fries on the side.

Yield:  About 4-5 servings

An InLinkz Link-up

Sunday, March 9, 2014

Secret Recipe Club: Oatmeal Molasses Rolls

Secret Recipe Club

I'm very excited to have joined a new cooking group called the Secret Recipe Club!  I've been wanting to join it for well over a year, so this is a long time coming.  The idea behind it is that each month, you are randomly assigned another member's blog, and your blog is assigned to someone as well.  Then you poke around on the other person's blog and pick any recipe, make it, then post about it on a specific day.  Fun!

My first match is the blog This Gal Cooks, which is written by a very nice sounding lady named Julie.  You should really check out her blog, the recipes all look amazing (I had a heck of a time narrowing down my options) and she takes lovely photos.  The recipe I chose was Oatmeal Molasses Rolls because they just looked so tasty and although I love wheat bread with oats on top, I've never actually baked bread with oats or molasses before.

I followed Julie's directions pretty much word for word, and the rolls turned out wonderfully!  They're hearty from the oats and whole wheat flour, but still very soft and fluffy with a hint of molasses.  Most definitely a keeper!  The only changes I would make are that next time I would sprinkle the oats on the rolls right after forming them into balls and really press them in with my hands because the oats ended up just falling off the baked rolls when I waited to sprinkle them on until right before baking.  Also, next time I'd like to experiment with adding 1/4 cup of brown sugar along with the yeast because I think the bit of sweetness would complement the molasses nicely.

Quick Note:  To make a warm place for dough to rise, I turn my oven to 350 for exactly 1 minute, then turn it off, place the dough in a container in the oven, and leave it to rise.  All ovens are different so you may need more or less than 1 minute.  It should be decidedly toasty warm when you stick your hand in the oven, but not hot since you don't want to actually bake the dough.  You can repeat the warming process after an hour or so if the oven has gone cold.


Oatmeal Molasses Rolls

1/4 C butter, plus 2 tbsp more for top
1 C milk
1/3 C molasses
1 Tbsp maple syrup
1/2 tsp salt
2 3/4 to 3 1/4 C white flour, divided
1 packet yeast
2 eggs
3/4 C whole wheat flour
3/4 C rolled oats, plus 1 tbsp more for top

Place 1/4 C butter, milk, molasses, maple syrup, and salt in a small saucepan and heat over medium until butter is melted.  Remove from heat and let cool until mixture is lukewarm (about 115 degrees) so it doesn't kill the yeast.

While molasses mixture cools, place 2 C white flour and the yeast in the bowl of a stand mixer.  Attach the paddle attachment and turn the mixer on low for a minute or two, just to combine the flour and yeast.  Add cooled molasses mixture along with the eggs and mix on speed 4 until well combined.  Add whole wheat flour and 3/4 C oats to bowl and continue to mix until well combined.

Replace the paddle attachment with the dough hook and add 3/4 C of the remaining white flour.  Mix on speed 2 until flour is incorporated.  If needed, add additional flour 2 tbsp at a time until dough pulls away from the side of the bowl and is barely sticky to the touch.  My dough ended up needing exactly 3 C white flour (so 1/4 C more), but yours may be different.

Reduce speed to the lowest setting and knead for 8 to 10 minutes.  Form dough into a ball.  Lightly oil dough ball and the bowl, cover with plastic wrap, and let rise in a warm place until it's doubled in bulk.  This will take 1 to 2 hours.

When dough has doubled in bulk, punch it down.  Place on a lightly floured surface and roll into a log.  Cut in half, then cut each half into 8 pieces.  Form into balls and divide evenly among two greased 8 or 9 inch cake pans.  You should have 16 roll balls.  Oil some plastic wrap (I just use no stick spray) and loosely cover the pans. 

Set pans in a warm place and let rise until rolls have doubled in bulk, about 30 to 60 minutes.  Remove plastic wrap and sprinkle rolls with about a tablespoon of oats per pan.  Turn oven to 375 and bake until rolls are golden and cooked through, about 10 to 12 minutes.  Remove from oven, brush with melted butter, and let cool for a few minutes before serving.

Yield: 18 large rolls

Wednesday, October 3, 2012

Ham & Cheese Hedgie Bread

I've seen this type of bread around the internet under the names hedgehog bread, bread pulls, and blooming bread.  Whatever you want to call it, one thing is certain:  it is DELICIOUS!  I mean really, really good; perfect for an occasional treat or a fun appetizer for a small group. The bread has interested me ever since I saw it over at The Girl Who Ate Everything, and this is my spin- I kind of combined her Bloomin' Onion Bread and her Ham and Cheese Sliders recipes.  Even though I made this back in May and just hadn't posted it yet, looking at the picture makes me want some RIGHT NOW!


Ham & Cheese Hedgie Bread

8 oz mini sourdough bread boule (California Goldminer Sourdough is what I used)
4 oz shaved ham, cut into 1 inch squares (I used sundried tomato rosemary ham)
4 oz thinly sliced cheddar, cut into 1/2 inch strips
3 T thinly sliced green onions
4 T butter
1 1/2 t poppy seeds
2 t dijon mustard
1/4 t Worcestershire sauce

Preheat oven to 350 and place a large piece of aluminum foil on a baking sheet.  Cut bread to look like a hedgehog, going first one direction, then the other, and being sure not to cut all the way through the bottom crust.  A serrated knife works best for this.  Place sliced loaf on the baking sheet.  Stuff in cheese (you may need to break the pieces more), then ham, then sprinkle on green onions, then spoon on butter mixture.  Wrap with the foil.  Bake covered 10 minutes, then unwrap and bake 10 minutes more, or until cheese is melted and bread is light golden.  Serve immediately with lots of napkins, but watch out for burned fingers!

Yield: about 6 servings

Tuesday, October 2, 2012

Tuesdays with Dorie: Cranberry Pumpkin Loaf

Okay, so this week's Tuesdays with Dorie recipe is for Cranberry WALNUT Pumpkin Loaf: a beautiful yeast bread with a hint of spice and full of pumpkin, cranberries and golden raisins.  I left out the walnuts because there is only 1 kind of bread that I have ever enjoyed with nuts in it.  The recipe also called for fresh cranberries but our store didn't have any, so I used dried cranberries.  I also halved the amount of nutmeg because I'm not the biggest fan of it, and I used allspice to make up the difference.

Must admit this is not a recipe I would usually make, but that is the entire reason I joined this baking group: to broaden my baking horizons.  While I like pumpkin bread okay, I already have a favorite recipe.  Also, neither of us care for dried fruit in our baked goods, especially not yeast breads.  However, the concept of a pumpkin yeast bread was intriguing, so I decided to go for it.

Anyway, to the actual recipe, which you can check out over at the blog This Bountiful Backyard.  This was another easy bread recipe, but definitely time consuming.  After you make the dough, it has to rise at room temperature for a couple of hours, then go into the fridge overnight, then sit out at room temperature for four more hours, then rise for another two hours after being shaped into loaves.  A number of TWD participants just skipped the fridge time and next time I make it (there will be a next time!), I will skip it as well.  I'd also like to try forming the dough into balls and baking them all in a 9 by 13 pan as rolls.  They would be the perfect addition to the Thanksgiving or Christmas table!


The verdict:  This bread is very nice.  The bit of spice is great and surprisingly, we both really like the dried fruit.  Good texture, too, and perfect when cut into thick slices.  I was expecting a dense bread, but it really isn't very dense.  The loaf in my picture looks like it didn't rise much, but it actually rose like a champ- the recipe calls for the bread to be baked in 3 tiny pans but I used 2 big pans so my bread is small.  I love how it looks- the orange bread with the yellow and red fruit is just beautiful, and it smelled wonderful both while the dough was being made and while it baked.  Just like autumn! 

Oh and funny side story- we adopted a stray cat from the local animal shelter last week and named him Declan.  He is a very friendly, laid back guy and spent 5 hours sleeping on the couch this evening, with us periodically nudging him and rolling him over to make space for ourselves.  At one point when the cat was kind of awake, my husband tried to get him to stand by lifting his side up.  As soon as he let go, Declan flopped back onto his side :D  Anyway, the thing that finally woke up the cat was the smell of this bread when we sat down on the couch with our slices!  And boy, was he awake FAST and trying to get his fair share!

Two minutes after we ate our bread, he was back to sleeping, but the next day he yoinked a discarded heel of Cranberry Pumpkin Loaf out of the trash can!

Tuesday, September 18, 2012

Tuesdays with Dorie: Whole Wheat Loaves

Time for another Tuesdays with Dorie recipe!  Last month one of the recipes was popovers, which I made and promptly forgot to post about.  Oops!  There's going to be a Tuesdays with Dorie makeup day at the end of this month so I might post about the popovers then or else try another recipe.

In any case, this week's recipe is Whole Wheat Loaves.  It's a basic wheat bread recipe that uses half white flour and half whole wheat flour.  This recipe was a dream to make and would be great for a first time bread baker.  I had to sub honey for maple syrup and molasses for malt syrup, AND I got sidetracked and let my dough grow too large during the first rise, but the finished bread turned out perfect anyway:

So far we've only put butter on it, but it would be great toasted with orange marmalade or made into grilled cheese sandwiches.  It's just a nice, standard wheat bread with good texture and good flavor.  Nothing fancy, but definitely good and I will make it again for sure!

If you want to see the recipe, you can check it out at Veggie Num Nums or The Family That Bakes Together.  Enjoy!

Tuesday, June 5, 2012

Tuesdays with Dorie: Oasis Naan

Hooray, finally a new Tuesdays with Dorie post!  Each month the group makes two recipes and participants are supposed to make at least one of them.  I didn't get to make EITHER recipe last month.  For the first recipe, Hungarian Shortbread which is filled with rhubarb jam, I got the date mixed up and anyway it was too early in the season here for the rhubarb the recipe required.  I do plan to make it soon though because it sounds delicious and the people who did make it seemed to really like it!  The second recipe was Pecan Sticky Buns.  Sounds good, but very complicated, and an awful lot of sticky buns for two people to eat since apparently they don't reheat well.  Also neither of us likes pecans in our baked goods.

So I was very happy to join the fun this time around with a recipe called Oasis Naan.  To check out the recipe, visit the blog Always Add More Butter or Of Cabbages and King Cake.  There's also a very helpful two part video that shows the creators of the recipe baking it with Julia Child, as well as a great article with lots of information.  If you've never had it before (I hadn't until tonight!), naan is a type of leavened flat bread served with all kinds of Middle Eastern dishes.  Many types of naan are quite long and skinny, but Oasis Naan is round and puffy around the edges, with coarse salt, green onion, and cumin seed sprinkled on top before baking.  It's baked in a very hot oven until crisp and golden on the bottom with some golden spots on top.  Like I said, this was my first time eating naan, but I thought it was amazing!  The bread itself had outstanding flavor, a wonderfully chewy texture, and the salt and green onion on top was delightful.  I'd imagine the cumin would have been great too if I had remembered to buy it.  Oops!  I love cumin and was a little sad that my naan had to go without, but there's always next time.  Weird as this may sound, I think the dough would make a dreamy pizza crust and plan to try it.  (Update:  I have used this as pizza dough and it is indeed delicious!)

As for the recipe itself, I followed it very closely.  Ended up using an extra half cup of flour in the dough and kneading it in my stand mixer on low for 5 minutes.  The recipe said to let the dough rise at room temperature for 2 hours, but because of timing issues, mine rose for 3 hours and got a little bigger than it was supposed to, though the recipe said it was okay if that happened.  My bread may have been a bit chewier because of this, but it was really, really good anyway and the dough developed a wonderful flavor while it rose.  I did form and bake mine a little differently.  My dough was wonderful to work with and although I started rolling the pieces out with a rolling pin like the recipe said, it ended up working better when I just patted it out with my hands.  As for baking, the recipe said to transfer the naan to a pizza stone or a cookie sheet that had preheated for 20 minutes in a 500 degree oven.  I did preheat my oven and cookie sheet properly, but I don't have a pizza peel or anything so I put my naan on a piece of parchment paper, picked up the paper, and put it on the baking sheet.  It worked out really well this way, though the parchment paper hanging over the edge of the baking sheet got VERY dark!  The cookie sheet also melted my favorite oven mitt when I took it out after the last batch of naan, so watch out for that if you do it this way!

All in all, I really liked this recipe.  It was super easy to make, fun to bake, and tasted great.  If you've never used yeast before, this would be a wonderful recipe to start with because the dough is easy to work with, the rising time isn't too important and it's all the more charming if the finished naan isn't perfectly round!  I served my naan with Indian Butter Chicken and steamed rice and we had a very enjoyable dinner.