I made these for a friend's birthday when she requested chocolate chip cookies. We're well into autumn here in Alaska, so a pumpkin twist seemed nice! This recipe comes from the blog Two Twenty One. Typical of me, I changed things a tiny smidge. The recipe says to mix the baking soda with a teaspoon of milk. That's something I'd never heard of, so I skipped that step and just added the baking soda with the dry ingredients and left out the milk. I also streamlined the prep a little.
These cookies are super fast and easy to make. No creaming ingredients together, no thinking ahead to take butter out of the fridge to soften. You end up with a batter rather than a dough and just plop dollops of batter on a cookie sheet instead of making balls. I used a 1 1/2 tablespoon cookie scoop to scoop the batter. Funny thing is the lady who wrote the recipe used the exact same scoop, but somehow got 6 more cookies? Not sure how that happened! Guess I just make big cookies.
We really liked these cookies. They are soft and cakey and pillowy, like blobs of the fluffiest pumpkin bread you've ever had, but studded with a rather obscene amount with chocolate chips. The cookies themselves are not excessively sugary, all things considered, but the chocolate chips bring the perfect amount of sweetness. They are also extremely cute, fat little things in the cheeriest shade of orange! Next time I'm going to experiment with using spelt flour, which bakes up lighter than whole wheat. I think the texture and flavor of spelt would mesh well with everything about this cookie.
Pumpkin Chocolate Chip Cookies
1 C white sugar
1 C canned pumpkin (not pumpkin pie filling)
1/2 C canola oil
1 tsp vanilla extract
1 egg
2 C flour
2 tsp baking powder
1 tsp baking soda
1/2 tsp salt
2 tsp cinnamon
2 C chocolate chips
Mix together sugar, pumpkin, oil, vanilla, and egg until well combined. Add remaining ingredients, except chocolate chips. Mix until combined. Stir in chocolate chips.
Set batter aside to rest for 15 minutes.
Preheat oven to 350. Drop 1 1/2 tablespoon blobs of dough onto the prepared cookie sheets, leaving 2 inches between cookies. Bake until lightly golden, about 10-15 minutes, depending on your oven.
These are rather delicate cookies, so let them cool 15 minutes on the baking sheets before transferring them to cooling racks.
Yield: 2 1/2 dozen cookies

Showing posts with label cookies. Show all posts
Showing posts with label cookies. Show all posts
Sunday, October 7, 2018
Friday, September 14, 2018
Raspberry Oatmeal Jammies/Copycat Franz Bakery Raspberry Oatmeal Cookies
The only packaged cookie I have ever liked other than Oreos or some of the Pepperidge Farm ones is these lightly cinnamon flavored, raspberry jam filled oatmeal cookies from Franz Bakery. I would buy about a pack a year, so it wasn't exactly a common indulgence. One day, it occurred to me to try to make them, I did a Google search, and ta da! Oatmeal Jammies from the blog Bake or Break! I made them immediately, with a few fiddly little changes to the ingredient list and preparation.
Boy, are these good! Undoubtedly better than the packaged ones. They are chewy around the edges but soft in the middle, are a little caramelized from the dark brown sugar, have way more raspberry jam than the packaged ones, and have that perfect little hint of cinnamon. They're best the day they're made because the chewiness dissipates and the jam may start getting a wee bit soggy, but they're tasty regardless a couple of days later.
I've only made these once, but can tell they for sure will be made many more times. Next time I'm going to experiment with adding a teaspoon of baking powder just to see if they'll puff up a bit more, but really, they're pretty perfect as is!
Raspberry Oatmeal Jammies
1 C salted butter, softened
1 C dark brown sugar
2 Tbsp white sugar
2 eggs
2 tsp vanilla extract
1 1/2 C flour
1 tsp baking soda
1 tsp cinnamon
3 C old fashioned oats
about 1/2 C raspberry jam
Preheat oven to 350 and line baking sheets with parchment paper, set aside.
Cream together butter and sugars until fluffy, then beat in eggs and vanilla extract. In a separate bowl, whisk together flour, baking soda, and cinnamon. Mix into butter-sugar mixture in 3 additions. Add oats and mix just until everything is completely combined.
Make walnut sized dough balls and place them 2 1/2 inches apart on the prepared cookie sheets- this dough spreads come. Use your thumb to make an indentation in each dough ball. Don't press too hard because you want a cookie layer thick enough under the jam that the jam won't seep through! You can kind of shore up the dough around the indentation to keep the jam contained.
Spoon about a teaspoon of jam into each thumbprint.
Bake until cookies are golden around the edges, about 10-15 minutes, depending on your oven. They are a bit fragile, so let them cool for 20 minutes or so before moving them to cooling racks.
Yield: About 2 dozen cookies
Thursday, August 16, 2018
Lemon Sugar Cookies
I made these lemon sugar cookies a while back and everyone liked them. They're just a classic sugar cookie with lemon flavor, so nothing super unusual, but very tasty and way more interesting than plain sugar cookies. They have the perfect sugar cookie texture- soft on the inside and crunchy on the outside with nice contrast from the turbinado sugar sprinkled on top- and the 3 sources of lemon flavor (zest, juice, and extract) make them so bright and cheery!
The original recipe is from Taste of Home. I added lemon extract and vanilla extract, made most of the cookies smaller, did NOT flatten them because some of the reviews said they were very thin (the thickness is completely normal if you don't flatten them), and sprinkled extra turbinado sugar on them when they came out of the oven.
The original calls for you to make giant cookies. I did make two great big ones with the last of the cookie dough. They were very good! Plenty of soft, chewy center and crunchy rim and there's something so appealing about an enormous cookie, even if you don't eat the entire thing in one go. The smaller ones are more practical for sure since the jumbos are way more than one serving each, but if you want to make big ones, go for it! Just make dough balls with 1/3 C dough, place them about 6 inches apart on a parchment paper lined cookie sheet, sprinkle with turbinado sugar, bake until just barely turning golden (about 12 minutes for mine), then sprinkle with more turbinado sugar.
Lemon Sugar Cookies
1 C salted butter, softened
1 1/2 C granulated sugar
1/2 C dark brown sugar
2 eggs
1 tsp lemon extract
1/2 tsp vanilla extract
zest of 1 lemon
2 Tbsp lemon juice
3 C flour
1 tsp baking soda
1/4 tsp cream of tartar
turbinado sugar (for topping)
Preheat oven to 350 and line baking sheets with parchment paper.
Cream together butter and sugar. Mix in eggs, extract, zest, and lemon juice.
In a separate bowl, mix together flour, baking soda, and cream of tartar. Add to butter mixture and mix just until completely combined. The dough will be rather soft.
Use a 1 1/2 Tbsp capacity cookie scoop (or roll the dough into 1 1/2 Tbsp balls) and place 3 inches apart on the prepared cookie sheets. Sprinkle with turbinado sugar.
Bake until ever so slightly beginning to turn golden, about 12 minutes.
When cookies are done baking, immediately sprinkle the tops with a little more turbinado sugar.
Cool on the cookie sheets for 10 minutes, then transfer to wire racks to finish cooling. Store in an airtight container.
Yield: about 40 normal sized cookies, maybe 10 or so if you make jumbos.
Sunday, July 1, 2018
Chocolate Coconut Bars
My husband loves these chocolate coconut bars! He requests them for special occasions. They're essentially a no-bake cookie base topped with coconut buttercream and a thin layer of chocolate. The first time I made them with Oreos, like the original recipe over at Taste of Home says, but they were so over the top sweet that I've made them with Nabisco Famous Wafers since. They're still very sweet, but not as sweet as with Oreos. Someday I would like to make them with chocolate graham crackers, but I can never find them at the store when I'm planning to make these. My husband has a huge sweet tooth though and you probably won't mind all the sugar if you do, too!
The recipe below has a few changes from the original, other than the type of cookies used. I basically added more coconut flavor.
Also, if you ever find yourself needing a coconut buttercream, you could use the coconut filling recipe and end up with a really delicious frosting! Just double the recipe and only add powdered sugar until it reaches a normal frosting consistency. As written, the filling recipe is quite stiff, which is needed for this bar recipe, but less powdered sugar will change that.
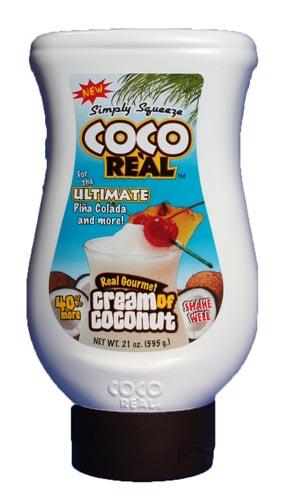
Note that the cream of coconut is not canned coconut milk, it's the sweetened goopy stuff used in mixed drinks. The brand we purchase is called Coco Real.
Chocolate Coconut Bars
cookie base:
3 C Famous Wafers crumbs or chocolate graham cracker crumbs (this is about 1 1/2 packs of wafers)
2 C sweetened, shredded coconut
1/2 C cream of coconut
2/3 C butter, melted
coconut filling:
1/3 C butter, softened
4 Tbsp cream of coconut, or more as needed
1/2 tsp coconut extract
3 C powdered sugar
chocolate layer:
1 1/2 C semisweet chocolate chips
4 tsp canola oil
To make the base layer, just stir together all of the base ingredients until well combined. Press it evenly and firmly into the bottom of an ungreased 9 by 13 dish. Refrigerate for an hour so it can firm up, then make the coconut filling.
To make the coconut filling, beat together butter, cream of coconut, and coconut extract, then mix in the powdered sugar. It will be quite thick, you want it to be thin enough to spread but still pretty thick so it doesn't squirt out the side of your bars when you slice them. Add more cream of coconut if you need to thin it any more.
Spread the coconut filling evenly over the cookie base and set aside while you make the chocolate layer.
To make the chocolate layer, melt the chocolate and oil together however you'd like: over a double boiler, or on 50% power in the microwave for 1 minute to start with, then 20-30 second increments afterwards, stirring between stints in the microwave. Don't let the chocolate get too hot or it will seize.
When chocolate is melted, pour it over the bars and spread with a spatula.
Refrigerate bars until the chocolate has firmed up. After that, you can store the bars at room temperature.
Cut into pieces and enjoy!
Yield: about 12 servings
Wednesday, December 21, 2016
Fantastical Food Fight: Earl Grey Shortbread
Time for the second Fantastical Food Fight! This month's assignment was shortbread cookies. A friend of mine on Facebook recently mentioned making shortbread cookies with earl grey tea in them. I love earl grey (and basically bergamot anything), so really didn't even consider making any other type of shortbread. My friend used a different recipe that had thumbprints filled with jam. That sounds delicious, but I wanted something simpler so the earl grey flavor could shine. This base recipe was originally called Scottish Shortbread and comes from Taste of Home. I added the tea.
Verdict? Yum! I used only one tea bag and couldn't taste much tea, so I put 2 tea bags in the instructions below. Better to start out with not enough than too much, right? Regardless, this is some tasty shortbread. Very buttery and crunchy. The brown sugar adds a lot of flavor and you'd never guess how few ingredients are in the recipe. I can't wait to make these again with more tea.
Unrelated, but I finally got a new camera so the iPad food photos will be no more. Enjoy the still terrible, but slightly less terrible food pictures!

Earl Grey Shortbread
1/2 C brown sugar (I used dark brown sugar)
about 2 C flour
contents of 2 earl grey tea bags, crushed (I used a mortar and pestle and Tazo brand earl grey)
Preheat oven to 325 and line a baking sheet with parchment paper. Set aside.
Cream together butter and sugar. Add flour and tea, mix until well combined- it will look dry at first. When dough comes together, remove it to a clean counter and knead for 5 minutes. You can add a little more flour if you need to. The goal is to have a rather stiff, but not dry or crumbly dough.
Roll dough out to 1/2 inch thickness and cut into 1 by 3 inch pieces. Transfer to the prepared baking sheet and arrange 1 inch apart. Poke cookies with a fork. Bake until light golden around the edges, about 20 to 30 minutes. Allow to cool, then store in a tin.
Yield: About 24 cookies
Saturday, July 30, 2016
Oatmeal Flax Chocolate Chip Cookies aka Lactation Cookies
My beautiful little nephew was born recently and
my sister-in-law was having some issues with breastfeeding while I was
visiting, so I searched the internet and found a cookie recipe that's
supposed to help increase a mother's milk supply. I decided to
go with this recipe from food.com,
but was forced to leave out the brewer's yeast after not finding any in
the 4 stores I looked in. Brewer's yeast is supposed to increase milk
production, but so is flax seed, so I decided to quadruple the flax
instead. The other changes were due to necessity (mini chocolate
chips!) and advice (the baking powder to help them puff up a bit more).
I
can't know for sure whether they helped with the milk supply, but I can
say they were surprisingly good even for us non-lactaters. Nice and
sweet and soft, and rather unique because of the flax meal, which adds
some pleasant texture. Even my 6 year old nephew enjoyed them, as did my parents and brother. Honestly, I'd like to make these again,
lactation cookie or not. If you'd like, you can add 4 Tbsp brewer's
yeast, though that has a pretty distinctive flavor and probably will not
improve the flavor of the cookie. That's beside the point though if you're making
them for milk supply purposes!
Oatmeal Flax Chocolate Chip Cookies aka Lactation Cookies
10 Tbsp water
1 C butter, softened
1 C sugar
1 C brown sugar
2 eggs
1 tsp vanilla extract
2 C flour
1 tsp salt
1 tsp baking soda
1/2 tsp baking powder
3 C oats
6 oz by weight mini chocolate chips
Preheat oven to 350 and line baking sheets with parchment paper.
Stir together flax meal and water and set aside for 5 minutes while you begin to make the cookie dough.
Beat
butter and sugars until fluffy. Beat in eggs, then flax meal mixture
and vanilla extract. Add flour, salt, baking soda, and baking powder,
and mix in. Add oats and stir just until combined (don't over mix),
then stir in mini chocolate chips.
Drop
spoonfuls of dough (make as big or small as you'd like, ranging from
large cherry to large walnut) onto prepared baking sheets, leaving an
inch or two between cookies. Bake until they begin to turn golden on
the edges and on the little craggy bits on the top, anywhere from 8 to
15 minutes depending on your oven and the size of the cookies. Cool
cookies for 10 minutes on cookie sheets, then transfer to cooling racks
to cool completely.
Yield: About 60 average size cookies
Wednesday, February 17, 2016
Copycat Lofthouse Soft Sugar Cookies
This was a completely impromptu recipe that I made the night before Valentine's Day. I took a nap in the afternoon, and woke up wanting to make Lofthouse style cookies to take to work for the kiddos to enjoy. Truly I have no idea why this occurred to me, I've only had Lofthouse cookies (or crack cookies, as my husband calls them) a few times, and not for years. Regardless, I quickly found a recipe (a slight variation on this one from Back to Her Roots) and whipped it up. The cookies turned out great. Very similar to Lofthouse, but I think better! Note that I don't always say that about homemade things- for instance, Twinkies have a charm all their own that can't be replicated at home- but these ones are better. They're thick and pillowy, but not dense, and the cookies themselves are not overly sweet. The frosting adds plenty of sweetness, though, and the almond extract just really makes them special. They have a lot of kid appeal, too.
Enjoy!

Copycat Lofthouse Soft Sugar Cookies
for cookies:
2 sticks salted butter, softened
1 C sour cream
1 3/4 C sugar
1 tsp vanilla extract
1 tsp almond extract
2 eggs
1 1/2 tsp baking powder
1 tsp baking soda
6 C flour
for frosting:
2 sticks salted butter, softened
4 C powdered sugar
1/2 tsp vanilla extract
1/2 tsp almond extract
5 Tbsp cream
food coloring
sprinkles
Preheat oven to 400 and line baking sheets with parchment paper.
Beat together softened butter and sour cream until smooth and creamy. Beat in sugar, extracts, and eggs, then add baking powder, baking soda, and flour. Mix just until well combined.
Roll dough into golf ball sized dough balls and place 2 inches apart on the prepared baking sheets. Grease the bottom of a drinking glass with butter and flatten the dough balls to 1/4 inch thick. Bake until cookies are set and barely, ever so slightly beginning to think about turning golden (but mostly white), about 7-9 minutes (mine took 9).
When cookies have cooled, prepare frosting. Beat together butter and powdered sugar until smooth and thick, then add extracts, cream, and desired amount of food coloring. Beat for a couple of minutes, until thick and fluffy.
Spread frosting on top of cookies and top with desired sprinkles. I suggest you frost a few cookies at a time, and add sprinkles as you go, pressing them down lightly so they adhere.
Let frosting set on top before storing in a covered container.
Yield: 48 cookies
Monday, July 27, 2015
Lovely Lemon Bars
This is another recipe from Joanne Fluke, the cozy mystery author. I just love the Hannah Swensen series, they're the comfort food of the literary world for me! These lemon bars are from the first book in the series, The Chocolate Chip Cookie Murder. I made them when a friend came to visit a couple of months ago. We loved them so much that they all got devoured before I had a chance to take a picture. Okay, I take that back- there are some pictures of my puppy licking lemon bar off my friend's baby's hand, but that's it! In spite of being crazy about them, for some reason this was the first time I made lemon bars, but we liked this recipe so much that I don't see myself trying any others!
Lovely Lemon Bars
2 C flour
1/2 C powdered sugar
2 sticks butter, cold
4 eggs
2 C sugar
1/2 C lemon juice
1 tsp lemon zest (optional)
1 tsp baking powder
1/2 tsp salt
4 Tbsp flour
Preheat oven to 350 and grease a 9 by 13 inch baking pan.
In a medium bowl, stir together flour and powdered sugar, then cut in the cold butter with your fingers or a pastry blender until the mixture looks like coarse cornmeal. Dump the mixture into the greased baking dish and press it down evenly with your hands. Bake in preheated oven until golden around the edges, about 15-20 minutes.
While the crust cooks, prepare the filling. Whisk together the sugar, lemon juice, and lemon zest, then whisk in the baking powder, salt, and flour until smooth.
When the crust has finished cooking, immediately pour the filling over the top and return the baking dish to the oven. Bake until golden on top, about 20-30 minutes. Let cool before cutting into bars and serving.
Yield: About 12 bars
Tuesday, May 12, 2015
Pecan Chewies
I'm not usually very fond of chopped up nuts in my desserts, unless we're talking about crunchy peanut butter in cookies. I like nuts just fine in savory dishes, and love peanut butter in desserts, but for some reason pieces of nuts in sweet things just do not appeal to me. The texture is distracting and even the flavor can be. Weird, I know!
So it's kind of a mystery why I was so fascinated by the recipe for Pecan Chewies over at Southern Bite. I came upon the recipe the first time I visited the blog and made them a couple of days later with the excuse of giving them to my neighbors. Let me tell you, my interest in the recipe was well founded! Pecan Chewies are so good, outstanding really! They definitely deserve to have the word "chewy" in their name and were still delicious almost a week later. I think they'd even be good without the pecans at all, though I did enjoy them. After I had the pan in the oven, I realized that I was supposed to use pecan halves instead of chopped pecans, oops! Next time I will do the pecan halves, but they were very good chopped, too. This may be a big no-no in the south, but I'd love to try the chewies with chopped cashews or maybe even mini chocolate chips.
Also, something kind of funny: I have made countless recipes from Southern Plate and it's probably my favorite cooking blog. It's definitely the one I've cooked from the most! After I made these (at the same time I realized I was supposed to use pecan halves instead of chopped), I discovered that the recipe had been guest posted on Southern Plate a couple of years ago. Figures!

Pecan Chewies
2 sticks butter, melted
1 C sugar
1 C brown sugar, packed (I used dark brown sugar)
2 eggs
2 tsp vanilla extract
2 C self rising flour (I used 2 C flour, 1 Tbsp baking powder, and 1/2 tsp salt)
1 C pecans (halves or chopped)
Preheat oven to 300 degrees and grease a 9 by 13 baking dish.
In a large bowl, stir together melted butter and sugars until smooth. Stir in eggs and vanilla until well incorporated, then flour until no lumps remain. Stir in pecans and spread mixture evenly in the baking dish.
Bake until just turning golden around the edges and a toothpick inserted in the center comes out clean, 40 to 50 minutes. Don't overbake!
Let cool completely before cutting into squares.
Yield: About 16 servings
So it's kind of a mystery why I was so fascinated by the recipe for Pecan Chewies over at Southern Bite. I came upon the recipe the first time I visited the blog and made them a couple of days later with the excuse of giving them to my neighbors. Let me tell you, my interest in the recipe was well founded! Pecan Chewies are so good, outstanding really! They definitely deserve to have the word "chewy" in their name and were still delicious almost a week later. I think they'd even be good without the pecans at all, though I did enjoy them. After I had the pan in the oven, I realized that I was supposed to use pecan halves instead of chopped pecans, oops! Next time I will do the pecan halves, but they were very good chopped, too. This may be a big no-no in the south, but I'd love to try the chewies with chopped cashews or maybe even mini chocolate chips.
Also, something kind of funny: I have made countless recipes from Southern Plate and it's probably my favorite cooking blog. It's definitely the one I've cooked from the most! After I made these (at the same time I realized I was supposed to use pecan halves instead of chopped), I discovered that the recipe had been guest posted on Southern Plate a couple of years ago. Figures!
Pecan Chewies
2 sticks butter, melted
1 C sugar
1 C brown sugar, packed (I used dark brown sugar)
2 eggs
2 tsp vanilla extract
2 C self rising flour (I used 2 C flour, 1 Tbsp baking powder, and 1/2 tsp salt)
1 C pecans (halves or chopped)
Preheat oven to 300 degrees and grease a 9 by 13 baking dish.
In a large bowl, stir together melted butter and sugars until smooth. Stir in eggs and vanilla until well incorporated, then flour until no lumps remain. Stir in pecans and spread mixture evenly in the baking dish.
Bake until just turning golden around the edges and a toothpick inserted in the center comes out clean, 40 to 50 minutes. Don't overbake!
Let cool completely before cutting into squares.
Yield: About 16 servings
Friday, May 1, 2015
Tickled Pink Lemonade Cookies
This is another cookie recipe from Joanne Fluke's murder
mystery series and comes from the book The Red Velvet Cupcake Murder.
Winter is finally, slowly, leaving Interior Alaska, and that's always
very exciting. Before I moved here, I never thought a bare patch of
ground would be such cause for celebration! It's hardly summer yet, but
when everything started melting, I immediately thought of this happy,
summery cookie from a book I read in the dead of winter.
It was a good choice, too, because these cookies are quite good! They have a definite lemonade flavor without making your mouth pucker up, and the pink is rather charming. The cookies themselves are thick and cake-like, which is a nice change. They're good on their own, but the frosting definitely adds to the appeal. My only change for next time will be to make a double batch because I only got 24 cookies. I gave half of them to a neighbor (my entire excuse for making cookies to start with) and the two of us plowed through the remaining cookies in short order.
The only changes I made to Joanne's recipe were to
use less red food coloring and more milk and pink lemonade concentrate
and frosting. More milk because the frosting was very stiff, and more
concentrate so the lemonade flavor would be apparent.It was a good choice, too, because these cookies are quite good! They have a definite lemonade flavor without making your mouth pucker up, and the pink is rather charming. The cookies themselves are thick and cake-like, which is a nice change. They're good on their own, but the frosting definitely adds to the appeal. My only change for next time will be to make a double batch because I only got 24 cookies. I gave half of them to a neighbor (my entire excuse for making cookies to start with) and the two of us plowed through the remaining cookies in short order.

Tickled Pink Lemonade Cookies
for cookies:
1 stick butter, softened
1/2 C sugar1/2 tsp baking powder
1/4 tsp baking soda
1 egg
1/3 C frozen pink lemonade concentrate, thawed
1/3 C frozen pink lemonade concentrate, thawed
red food coloring, as desired
1 3/4 C flour
for frosting:
2 Tbsp butter, softened
2 C powdered sugar
5 tsp milk
4 tsp frozen pink lemonade concentrate, thawed
red food coloring, as desired
For Cookies:
Preheat oven to 350 and line baking sheets with parchment paper.
Cream
together butter and sugar until fluffy. Mix in baking powder, and
baking soda, then egg and lemonade concentrate. Beat until thoroughly
mixed. It will look curdled, don't worry! Stir in red food coloring to
make the dough as pink as you'd like. Stir in flour until well
combined, but don't over mix.At this point, you can refrigerate the dough for half an hour if it's too soft to work with, but mine was fine. Use two spoons or a small cookie scoop to scoop small walnut sized blobs of dough onto the prepared cookie sheets, 2 inches apart. Bake until the cookies are set and just barely beginning to turn very light golden in some spots, about 10-12 minutes. Let cookies cool completely, then frost with the frosting.
For Frosting:
Place butter and powdered sugar into a mixing bowl and beat until the butter is dispersed, it will look very dry. Add milk and lemonade concentrate, and beat until smooth. You can add more milk or more powdered sugar if it's too thick or too wet. You want a smooth, spreadable consistency. When you've reached that, stir in red food coloring so it's as pink as you'd like. I didn't use any for the frosting because the pink lemonade concentrate made it ever so slightly pink on its own.
Frost cookies with frosting, let them sit out until the frosting is dry to the touch, then store them in an airtight container. I can say they stay good for 3 days, maybe longer, but that's as long as they lasted here!
Yield: About 24 cookies
Wednesday, April 15, 2015
Peanut Butter Melts
This
recipe comes from the murder mystery book The Blueberry Muffin Murder
by Joanne Fluke. The book is from a series, and all the book titles
follow the "The (baked good) Murder" format. Each novel has several
recipes in it. I first purchased one of the books randomly at the
grocery store a couple of months ago, and have come to really enjoy the
series. The stories aren't particularly suspenseful, and the writing
style doesn't charm me like some authors, but they just really appeal to
me for some reason and are almost comforting to read. They're the
mashed potatoes and mac and cheese of my home library!
Anyway,
I have a lifelong love of all things peanut butter, but peanut butter
cookies rarely live up to my standards of peanut butteriness. The
flavor is usually too weak. I love a really good PB cookie, but have
only found two recipes that are good enough. One is this one and the
other I haven't posted on the blog yet. I decided to try this version
because the name appealed to me (Peanut Butter Melts, interesting!), the
melted butter seemed interesting, and I liked that it has molasses. It
also has a full cup of PB, which seemed promising!
Preheat oven to 375 and line cookie sheets with parchment paper.
Beat
together melted butter, sugar, vanilla, and molasses. Mix in baking
soda, baking powder, and salt, then mix in peanut butter until well
combined. Add eggs and mix again until well combined. Add flour and
mix just until the dough comes together.Yield: I got exactly 50 cookies from this recipe.
Wednesday, February 25, 2015
Oatmeal Coconut M&M Cookies
I quickly made these the other night as a surprise for my husband. They're so good! We both loved them, they're perfect. Oats, coconut, M&Ms, and lots of vanilla flavor in a thick, chewy, moist cookie. Yum! Next time I may try toasting the coconut first, but that's the only thing I'd be at all interested in changing. Also, holy moly, for once in my life a cookie recipe actually made exactly the number of cookies it said it would! Proving once again that my normal cookies are huge, we thought these were cute and tiny.
This recipe is from a Pillsbury recipe booklet from 1991 called Cookies, Brownies, and Bars.
Update: This has become one of the cookie recipes I make most frequently. They're delicious, quick to make, and just happy cookies. I still haven't tried toasting the coconut first, but will one of these days. I'd also like to try leaving out the M&Ms but adding white chocolate chips and dried cranberries, doesn't that sound good?

Oatmeal Coconut M&M Cookies
1 C butter, softened
1 1/2 C packed brown sugar
1 Tbsp vanilla extract
1 Tbsp milk
2 eggs
2 1/4 C flour
2 tsp baking powder
1 tsp baking soda
1/2 tsp salt
2 C rolled oats (old fashioned or quick)
1 C sweetened coconut shreds
13 oz package M&Ms, divided
Preheat oven to 375 and line baking sheets with parchment paper. Cream together butter and brown sugar until fluffy. Mix in vanilla extract, milk, and eggs. Add flour, baking powder, baking soda, and salt and mix in just until combined. Add oats, coconut, and all but 1/2 C of the M&Ms and stir until combined, being careful not to over mix. You may need to get in there with your hands to finish mixing as the dough is rather stiff.
Roll dough into small balls (I made them slightly larger than a cherry), place 1 1/2-2 inches apart on the baking sheets, and press 2 M&Ms into the top of each cookie. Bake just until golden, about 10-12 minutes.
Yield: 4 1/2 dozen small cookies
This recipe is from a Pillsbury recipe booklet from 1991 called Cookies, Brownies, and Bars.
Update: This has become one of the cookie recipes I make most frequently. They're delicious, quick to make, and just happy cookies. I still haven't tried toasting the coconut first, but will one of these days. I'd also like to try leaving out the M&Ms but adding white chocolate chips and dried cranberries, doesn't that sound good?
Oatmeal Coconut M&M Cookies
1 C butter, softened
1 1/2 C packed brown sugar
1 Tbsp vanilla extract
1 Tbsp milk
2 eggs
2 1/4 C flour
2 tsp baking powder
1 tsp baking soda
1/2 tsp salt
2 C rolled oats (old fashioned or quick)
1 C sweetened coconut shreds
13 oz package M&Ms, divided
Preheat oven to 375 and line baking sheets with parchment paper. Cream together butter and brown sugar until fluffy. Mix in vanilla extract, milk, and eggs. Add flour, baking powder, baking soda, and salt and mix in just until combined. Add oats, coconut, and all but 1/2 C of the M&Ms and stir until combined, being careful not to over mix. You may need to get in there with your hands to finish mixing as the dough is rather stiff.
Roll dough into small balls (I made them slightly larger than a cherry), place 1 1/2-2 inches apart on the baking sheets, and press 2 M&Ms into the top of each cookie. Bake just until golden, about 10-12 minutes.
Yield: 4 1/2 dozen small cookies
Monday, December 22, 2014
Bizcochitos
Bizcochitos are the official state cookie of New Mexico and have been around in different versions for hundreds of years. They're traditionally made with lard, always seem to have anise and some type of alcohol (like brandy or wine) or juice in the dough, and are sprinkled with or rolled in cinnamon sugar. I've been wanting to make them for years and finally did it! No regrets, these cookies are delicious. They have a crunchy, shortbread texture to them and the anise is delightful. It's definitely there, but is not too strong at all. Even my husband liked these quite a bit.
This time around I used shortening and orange juice, but in the future I would like to experiment with butter, solid coconut oil, and MAYBE even lard for the fat, and brandy and wine for the liquid. We liked these so much that I plan to make these every Christmas, so I will have many opportunities to experiment!
I got this recipe from a blog called The Nickel and Dime Ranch. The blog owner, Bridget, says the recipe came from a New Mexican cookbook called License to Cook. After I made the recipe, I found basically the same recipe on AllRecipes! I wonder if the recipe submitter got it from the same cookbook as Bridget.
Tip: After you've pressed the cookie cutter down into the rolled out dough, wiggle it around a bit so the cut out will be sufficiently separated from the surrounding dough. This will make it easier to remove the excess cookie dough.

Bizcochitos
1 C vegetable shortening
3/4 C sugar
1 tsp anise seeds, lightly crushed with a mortar and pestle
1 egg
1/4 C orange juice
3 C flour
1 1/2 tsp baking powder
1/2 tsp salt
topping:
1/4 C sugar
1/2 Tbsp cinnamon
With an electric mixer, cream together shortening, sugar, and anise. Beat in egg, then orange juice. Scrape down sides of bowl. In another bowl, whisk together flour, baking powder, and salt. Add to shortening mixture and stir just until the dough comes together. Do not over work the dough. The dough should be fairly soft and not sticky. Gently form the dough into a ball.
Lightly flour a clean, flat surface. Place the dough ball on the middle of the rolling surface and pat it down a bit with your hands so it's flat. Dust lightly with flour and brush the flour around with your hand. Roll the dough out carefully with a rolling pin, so it's about 1/8 to 1/4 inch thick- whichever you prefer. I did both and they were all great! Add a little more flour if the dough starts to stick to the rolling pin.
Cut the dough out with cookie cutters and carefully move the cut outs to the prepared baking sheets with a very thin pancake turner. The shapes won't really spread in the oven, so you can space them 1 inch apart. Repeat rolling out the dough until it's all used up.
When the cookie sheet is full, stir together the 1/4 C sugar and 1/2 Tbsp cinnamon and sprinkle it generously over each cookie. Bake until cookies are light golden around the edges, about 10 to 15 minutes depending on how thinly you rolled the dough and how big your cookie cutters are.
Optional: You can gently roll the cookies through the cinnamon sugar again when they come out of the oven (before they cool) if you want. I didn't do this because we liked the cookies just fine as they were, but I'm sure it would be good this way!
In either case, let the cookies cool until you can handle them without them breaking, then remove them to wire cooling racks. When they've cooled completely, you can store them in a tin or an airtight cookie jar.
Yield: 25-50 cookies, depending on how thin you roll the dough and the size of your cookie cutters.
This time around I used shortening and orange juice, but in the future I would like to experiment with butter, solid coconut oil, and MAYBE even lard for the fat, and brandy and wine for the liquid. We liked these so much that I plan to make these every Christmas, so I will have many opportunities to experiment!
I got this recipe from a blog called The Nickel and Dime Ranch. The blog owner, Bridget, says the recipe came from a New Mexican cookbook called License to Cook. After I made the recipe, I found basically the same recipe on AllRecipes! I wonder if the recipe submitter got it from the same cookbook as Bridget.
Tip: After you've pressed the cookie cutter down into the rolled out dough, wiggle it around a bit so the cut out will be sufficiently separated from the surrounding dough. This will make it easier to remove the excess cookie dough.
Bizcochitos
1 C vegetable shortening
3/4 C sugar
1 tsp anise seeds, lightly crushed with a mortar and pestle
1 egg
1/4 C orange juice
3 C flour
1 1/2 tsp baking powder
1/2 tsp salt
topping:
1/4 C sugar
1/2 Tbsp cinnamon
With an electric mixer, cream together shortening, sugar, and anise. Beat in egg, then orange juice. Scrape down sides of bowl. In another bowl, whisk together flour, baking powder, and salt. Add to shortening mixture and stir just until the dough comes together. Do not over work the dough. The dough should be fairly soft and not sticky. Gently form the dough into a ball.
Lightly flour a clean, flat surface. Place the dough ball on the middle of the rolling surface and pat it down a bit with your hands so it's flat. Dust lightly with flour and brush the flour around with your hand. Roll the dough out carefully with a rolling pin, so it's about 1/8 to 1/4 inch thick- whichever you prefer. I did both and they were all great! Add a little more flour if the dough starts to stick to the rolling pin.
Cut the dough out with cookie cutters and carefully move the cut outs to the prepared baking sheets with a very thin pancake turner. The shapes won't really spread in the oven, so you can space them 1 inch apart. Repeat rolling out the dough until it's all used up.
When the cookie sheet is full, stir together the 1/4 C sugar and 1/2 Tbsp cinnamon and sprinkle it generously over each cookie. Bake until cookies are light golden around the edges, about 10 to 15 minutes depending on how thinly you rolled the dough and how big your cookie cutters are.
Optional: You can gently roll the cookies through the cinnamon sugar again when they come out of the oven (before they cool) if you want. I didn't do this because we liked the cookies just fine as they were, but I'm sure it would be good this way!
In either case, let the cookies cool until you can handle them without them breaking, then remove them to wire cooling racks. When they've cooled completely, you can store them in a tin or an airtight cookie jar.
Yield: 25-50 cookies, depending on how thin you roll the dough and the size of your cookie cutters.
Sunday, December 21, 2014
Chocolate Dipped Coconut Macaroons
This is another recipe from Making Memories With Your Kids! Thanks for being such a great source of Christmas treats this year, Erin :)
I've always liked coconut macaroons, but my husband didn't finally give in and start liking coconut until recently. He loved these, and so did I! The almond extract is just perfect in them. They're so dense, chewy, rich, crunchy around the edges, and just perfect. I'm not sure if they should be classified as a cookie or a candy, but they can definitely be classified as amazing and a recipe to make again next Christmas!
My only changes for next time are that I would make them a little smaller because they're so rich (I used a cookie scoop and only got 15 out of this recipe), and I would dip them in melted semisweet chocolate instead of milk chocolate. I have a definite preference for milk chocolate if I'm just eating it, but it's so sweet and the chocolate flavor was kind of lost here. Normally I don't post a recipe on my blog if I have changes to make, but the chocolate thing is pretty minor and I'm 100% sure the semisweet chocolate will work.

Chocolate Dipped Coconut Macaroons
14 oz can sweetened condensed milk (NOT evaporated)
2 tsp vanilla extract
1 1/2 tsp almond extract
14 oz bag sweetened, shredded coconut
1/2 C flour
1 1/2 C semisweet chocolate chips
Preheat oven to 350 and line baking sheets with parchment paper.
In a large bowl, stir together condensed milk and extracts. Break up the coconut with your hands and sprinkle it over the condensed milk, then sprinkle the flour evenly over that. Stir together until everything is well combined. Use 2 spoons or a small cookie scoop to scoop up the mixture and make little balls on the prepared cookie sheets, about 1 1/2 inches apart. These don't spread or grow in the oven, so keep that in mind when you shape the macaroons! I chose to squash mine down slightly so they wouldn't be rounded.
Bake until the macaroons are light golden and the stray coconut bits are browned. How long this takes will depend on your oven and the size of the macaroons, but somewhere between 10 and 16 minutes will probably work.
Let macaroons cool on the cookie sheets until you can handle them, then put them on a plate and refrigerate until very cold. Save the parchment paper.
Melt chocolate chips. I used the microwave and heated them in 15 second increments at 50% power, stirring between each cooking burst, but use whatever method you prefer.
When you're ready to dip the macaroons, remove them from the refrigerator and set your parchment paper lined cookie sheets nearby (you can use the same parchment paper they were baked on). Dip the bottoms into the chocolate. Set dipped macaroons on the parchment paper lined cookie sheets and refrigerate them until the chocolate is set. You can store the finished macaroons in a tin at room temperature.
Yield: Depends on how big you make them. About 15 big ones or 30 small ones.
I've always liked coconut macaroons, but my husband didn't finally give in and start liking coconut until recently. He loved these, and so did I! The almond extract is just perfect in them. They're so dense, chewy, rich, crunchy around the edges, and just perfect. I'm not sure if they should be classified as a cookie or a candy, but they can definitely be classified as amazing and a recipe to make again next Christmas!
My only changes for next time are that I would make them a little smaller because they're so rich (I used a cookie scoop and only got 15 out of this recipe), and I would dip them in melted semisweet chocolate instead of milk chocolate. I have a definite preference for milk chocolate if I'm just eating it, but it's so sweet and the chocolate flavor was kind of lost here. Normally I don't post a recipe on my blog if I have changes to make, but the chocolate thing is pretty minor and I'm 100% sure the semisweet chocolate will work.
Chocolate Dipped Coconut Macaroons
14 oz can sweetened condensed milk (NOT evaporated)
2 tsp vanilla extract
1 1/2 tsp almond extract
14 oz bag sweetened, shredded coconut
1/2 C flour
1 1/2 C semisweet chocolate chips
Preheat oven to 350 and line baking sheets with parchment paper.
In a large bowl, stir together condensed milk and extracts. Break up the coconut with your hands and sprinkle it over the condensed milk, then sprinkle the flour evenly over that. Stir together until everything is well combined. Use 2 spoons or a small cookie scoop to scoop up the mixture and make little balls on the prepared cookie sheets, about 1 1/2 inches apart. These don't spread or grow in the oven, so keep that in mind when you shape the macaroons! I chose to squash mine down slightly so they wouldn't be rounded.
Bake until the macaroons are light golden and the stray coconut bits are browned. How long this takes will depend on your oven and the size of the macaroons, but somewhere between 10 and 16 minutes will probably work.
Let macaroons cool on the cookie sheets until you can handle them, then put them on a plate and refrigerate until very cold. Save the parchment paper.
Melt chocolate chips. I used the microwave and heated them in 15 second increments at 50% power, stirring between each cooking burst, but use whatever method you prefer.
When you're ready to dip the macaroons, remove them from the refrigerator and set your parchment paper lined cookie sheets nearby (you can use the same parchment paper they were baked on). Dip the bottoms into the chocolate. Set dipped macaroons on the parchment paper lined cookie sheets and refrigerate them until the chocolate is set. You can store the finished macaroons in a tin at room temperature.
Yield: Depends on how big you make them. About 15 big ones or 30 small ones.
Thursday, December 18, 2014
Snickerdoodles
December is always full of baking cookies and other treats, and I have 3 great recipes to share over the next few days.
The first is Snickerdoodles. How well known are these cookies? I'd never even heard of them until I was 10 and I met a new friend with a super cute bunny named Snickerdoodle, my husband had never heard of them until I made these, and a friend of mine didn't know what they were either. Although I have eaten Snickerdoodles (and knew they were amazing), for some reason this was my first time making them, and they were incredible. As in, my husband, who has a HUGE preference for chocolate chip cookies, said they give his CCC recipe a run for its money! Wow!
The recipe is from Erin over at Making Memories With Your Kids. I was assigned her blog for Secret Recipe Club last week and made White Chocolate Raspberry Cookies for that, but went on to make these a few days later, and then just yesterday I made another of her cookie recipes (which will be posted here soon!).
Erin, you may get a kick out of this- when I was ready to make these, I asked my husband to pull up the recipe on his computer and he typed into Google "making memories with your Snickerdoodles." That did lead to the correct recipe!
These cookies are fantastic as they are, but next time I may experiment with using 2 t cream of tartar because a lot of other recipes I looked at use that much for this amount of flour.

Snickerdoodles
2/3 C brown sugar
1 t vanilla extract
2 eggs
1/2 t salt
1/2 t cream of tartar
1 t baking soda
3 C flour
1 T cinnamon
Cream
together butter and sugars for 1 minute. Beat in vanilla extract and
eggs, then salt, cream of tartar, and baking soda. Mix in flour, being
careful not to over mix. Refrigerate cookie dough for 1 hour.
Preheat
oven to 300 and line baking sheets with parchment paper. In a small
bowl, stir together 1/4 C sugar and 1 T cinnamon. Roll dough into
walnut sized balls and roll in cinnamon sugar to coat. Space 2 inches
apart on the prepared baking sheets.
Bake cookies just until starting to turn golden. This was 17 minutes in my oven, but yours may take more or less time! I'd suggest checking on them after 10 minutes.
Yield: I got 30 cookies from this recipe.
The first is Snickerdoodles. How well known are these cookies? I'd never even heard of them until I was 10 and I met a new friend with a super cute bunny named Snickerdoodle, my husband had never heard of them until I made these, and a friend of mine didn't know what they were either. Although I have eaten Snickerdoodles (and knew they were amazing), for some reason this was my first time making them, and they were incredible. As in, my husband, who has a HUGE preference for chocolate chip cookies, said they give his CCC recipe a run for its money! Wow!
The recipe is from Erin over at Making Memories With Your Kids. I was assigned her blog for Secret Recipe Club last week and made White Chocolate Raspberry Cookies for that, but went on to make these a few days later, and then just yesterday I made another of her cookie recipes (which will be posted here soon!).
Erin, you may get a kick out of this- when I was ready to make these, I asked my husband to pull up the recipe on his computer and he typed into Google "making memories with your Snickerdoodles." That did lead to the correct recipe!
These cookies are fantastic as they are, but next time I may experiment with using 2 t cream of tartar because a lot of other recipes I looked at use that much for this amount of flour.
Snickerdoodles
1 C butter, softened
1 C white sugar
topping:
1/4 C white sugarBake cookies just until starting to turn golden. This was 17 minutes in my oven, but yours may take more or less time! I'd suggest checking on them after 10 minutes.
Sunday, December 14, 2014
Secret Recipe Club: White Chocolate Raspberry Cookies
This is my second Secret Recipe Club assignment for this month! I signed up for Cookie Carnival. Basically, I was given the blog Making Memories with Your Kids and told to make any cookie recipe, then post about it. Making Memories with Your Kids is written by a very hardworking mom named Erin. Her blog is absolutely full of amazing looking recipes and child friendly craft ideas. She has a lot of great looking cookie recipes, and I chose White Chocolate Raspberry Cookies. I've always wanted to make this kind of cookie, but couldn't figure out how to do the raspberry part. Jelly would be too runny and would burn, raspberry flavored chips wouldn't seem right... What to do? Well, it turns out the secret ingredient is POP TARTS! Genius, Erin!
Anyway, I made these exactly according to the recipe, except I cut back on the salt a little, and had to use semisweet chocolate chips. I swear this was not intentional. I thought I had white chocolate chips in the pantry, but did not, and my dough was all ready for the chips, so I simply had to use what I had. They turned out fine, but I truly believe they would have been best with the white chocolate chips because the semisweet flavor overpowered the raspberry a bit. Shame! Sorry, Erin! I have written the recipe below calling for white chocolate chips, though, and will definitely use those next time. At some point I would also like to experiment with white chocolate chips, lemon extract, blueberry Pop Tarts, and maybe even adding some oats to the dough. Regardless, these cookies are a winner for sure!
Erin has so many yummy cookies, I think I'm going to have to make her Candy Cane Pudding Cookies, Marble Cookies, Root Beer Float Cookies, Andes Mint Cookies, Peanut Butter Mallow Cookie Treats, Chocolate Dipped Macaroons, and Snickerdoodles. I'm actually headed to the kitchen right now to make her Snickerdoodles, and have the ingredients for Chocolate Dipped Macaroons on my grocery list!

White Chocolate Raspberry Cookies
1 C butter, softened
3/4 C packed brown sugar
3/4 C white sugar
1 tsp vanilla extract
2 eggs
2 1/4 C flour
1/4 tsp salt
1 tsp baking soda
1 C white chocolate chips
pack of 8 Raspberry Pop Tarts (14.7 oz box)
Preheat oven to 375 and line baking sheets with parchment paper. Cream together butter, sugars, and vanilla until light and fluffy. Beat in eggs. In a separate bowl, whisk together flour, salt, and baking soda. Stir into butter mixture, then stir in white chocolate chips. Break up Pop Tarts with your hands and then gently fold them into the cookie dough.
Roll dough into golf ball sized balls and arrange 2 inches apart on the prepared baking sheets. Bake until cookies are light golden, about 10 minutes.
Yield: This made 30 for me, you will get more of course if you don't make your cookies as big as mine!
Anyway, I made these exactly according to the recipe, except I cut back on the salt a little, and had to use semisweet chocolate chips. I swear this was not intentional. I thought I had white chocolate chips in the pantry, but did not, and my dough was all ready for the chips, so I simply had to use what I had. They turned out fine, but I truly believe they would have been best with the white chocolate chips because the semisweet flavor overpowered the raspberry a bit. Shame! Sorry, Erin! I have written the recipe below calling for white chocolate chips, though, and will definitely use those next time. At some point I would also like to experiment with white chocolate chips, lemon extract, blueberry Pop Tarts, and maybe even adding some oats to the dough. Regardless, these cookies are a winner for sure!
Erin has so many yummy cookies, I think I'm going to have to make her Candy Cane Pudding Cookies, Marble Cookies, Root Beer Float Cookies, Andes Mint Cookies, Peanut Butter Mallow Cookie Treats, Chocolate Dipped Macaroons, and Snickerdoodles. I'm actually headed to the kitchen right now to make her Snickerdoodles, and have the ingredients for Chocolate Dipped Macaroons on my grocery list!
White Chocolate Raspberry Cookies
1 C butter, softened
3/4 C packed brown sugar
3/4 C white sugar
1 tsp vanilla extract
2 eggs
2 1/4 C flour
1/4 tsp salt
1 tsp baking soda
1 C white chocolate chips
pack of 8 Raspberry Pop Tarts (14.7 oz box)
Preheat oven to 375 and line baking sheets with parchment paper. Cream together butter, sugars, and vanilla until light and fluffy. Beat in eggs. In a separate bowl, whisk together flour, salt, and baking soda. Stir into butter mixture, then stir in white chocolate chips. Break up Pop Tarts with your hands and then gently fold them into the cookie dough.
Roll dough into golf ball sized balls and arrange 2 inches apart on the prepared baking sheets. Bake until cookies are light golden, about 10 minutes.
Yield: This made 30 for me, you will get more of course if you don't make your cookies as big as mine!
Tuesday, October 28, 2014
Jumbo Monster Cookies
They may seem like an odd choice for an
adult, but Monster Cookies are my favorite kind of cookie! They're easy
to make, bright and cheery to look at, and most importantly, they taste
great. The peanut butter flavor is wonderful and the mix of 3 kinds of
chocolate works really well. There are tons of versions of Monster
Cookies out there, and this is just my version. Many use less peanut
butter, have nuts or other things like pretzels or raisins, and I
haven't seen any with white chocolate chips, but the white chocolate
chips add a lot! My version is based on Paula Deen's recipe.
For
this batch, I used a giant 1/3 C cookie scoop that my mother-in-law
gave us recently. The cookies turned out comically huge, big enough
that even cookie lovers like us break them in half to share. You can
make them smaller (slightly larger than a golf ball is good), but come
on, they're Monster Cookies- they should be bigger than average!

Monster Cookies
1 stick salted butter, softened
16 oz jar of peanut butter
3 eggs
1/2 tsp salt
1/2 tsp vanilla extract
2 tsp baking soda
4 1/2 C quick oats (not instant)
3/4 C semisweet chocolate chips
3/4 C white chocolate chips
3/4 C M&Ms, plus more for the top of the cookies
Preheat oven to 350 and line large cookie sheets with parchment paper.
In a large mixing bowl, mix together butter, the sugars, peanut butter, eggs, salt, and vanilla until smooth. Scrape down the sides of the bowl and add baking soda, oats, and chocolate, and stir until everything is well combined, but don't over mix.
Measure dough into 1/3 C portions and roll each portion into a ball. Place dough balls about 3 1/2 inches apart on the cookie sheets. Top each dough ball with 6 more M&Ms, then flatten the cookies with the palm of your hand because they don't spread a ton on their own.
Bake cookies until light golden, about 15-20 minutes depending on your oven. Let the cookies cool on the pans for 10 minutes, then place them on a cooling rack to finish.
Yield: 14 jumbo cookies or about 3 dozen smaller ones
Bake cookies until light golden, about 15-20 minutes depending on your oven. Let the cookies cool on the pans for 10 minutes, then place them on a cooling rack to finish.
Subscribe to:
Posts (Atom)