Tuesday, November 20, 2012

Black Bean, Corn, and Potato Burritos

This burrito filling is something I just tossed together for dinner using ingredients in the fridge and pantry that I'm trying to use up in preparation for all the Thanksgiving leftovers.  It's very simple and may sound boring, but it's surprisingly good!  My husband declared them to be magical because the ingredients on their own are kind of plain, but they combine to make something really tasty.  This is also a VERY cheap vegetarian or vegan meal, especially if you serve them with homemade tortillas and go easy on the array of burrito toppings.  I think it would also actually be good served as a sort of hash by leaving the mixture in the skillet, pressing in some indentations, cracking eggs into the indentations, replacing the lid, and cooking until the egg is set.  Yummy!

Quick note: You can easily use diced onion and garlic instead of the powders, I just didn't have any.  Add the onion about halfway through the cooking time of the potatoes and add the garlic when the potatoes only have a couple of minutes left.  Also, don't add any cheese if you want the burritos to be vegan!

Behold, my burrito with monterey jack cheese and salsa verde:


Black Bean, Corn, and Potato Burritos

2 medium-large baking potatoes (each about 12 oz)
2-3 T butter (can use olive oil to make it vegan)
16 oz can black beans, drained
2 C frozen corn
salt and pepper to taste
1/2 t chili powder
1/4 t cumin
1/2 t onion powder
1/4 t garlic powder
tortillas and your favorite burrito toppings

Wash potatoes and cut into small cubes, each about 1/3 inches wide.  Melt butter in a large skillet over medium, add the potatoes, and toss to coat.  Cover pan and cook, tossing every couple of minutes, for about 10 minutes or until the potatoes begin to soften.  Remove lid and cook about 5 minutes more or until cooked through and nicely golden.  Add salt and pepper to taste.  Add drained beans, corn, and spices, and cook through.  Taste and add more salt if necessary.  Serve in tortillas with your favorite toppings.

Yield: about 6 servings

Tuesdays with Dorie: Best Ever Brownies

This week's recipe is for brownies!  I have to admit that homemade brownies and I do not have a good track record and I've always been a die hard fan of brownie mix.  It's the only dessert that I thought was better from a package than homemade.  I've only tried making them from scratch a couple of times, and they were always exceedingly "blah."  I've had other people's homemade brownies, too, and no matter how much they brag about them, they too are unremarkable, or at least not as good as the kind from a mix.

Well, my friends, all that has changed with this recipe for Best Ever Brownies!  Theoretically we only have to make one Tuesdays with Dorie recipe each month and I already did mine for November, but since I have had exceedingly good results with all but one recipe from the Baking with Julia book, I decided to go for it!  Absolutely no regrets because these really ARE the best brownies either of us have ever had.  Rich, chocolaty, very fudgy, a little chewy, moist, and with that perfect crackled brownie top.  They also stay good for several days, which is a bonus since we don't feel pressured to eat the entire pan in a day :oD  I am also very happy at the prospect of leaving boxed brownie mix behind forever (or mostly, at least- I have a super easy PB Brownie Bites recipe I'll be sharing soon).

You can view the recipe over at A Beautiful Mess.  The only change I made was to use all semisweet chocolate chips for the chocolate.  It turned out delicious this way, but next time I will definitely use the unsweetened and bittersweet chocolates specified in the recipe so it will have even more chocolate flavor.  I also had to bake the recipe a full 50 minutes, basically twice as long as the recipe said.  This was a common issue other TWD people encountered.  I'm certain my brownies were not overbaked- they were completely liquid at 25 minutes and it wasn't until 50 minutes that my toothpick came out gooey rather than covered with runny batter.  To counteract this, I'd like to try baking the batter in a 9 by 13 pan since the brownies were quite thick anyway, and I will DEFINITELY grease the pan (the recipe said not to) since they stuck to the bottom some.  Those little issues aside, this recipe is awesome and I will definitely make them again and again (and again)!


Saturday, November 17, 2012

Creamy Herb and Tomato Shell Casserole

 Do you love cheese and noodles?  That's probably a "yes" since you ended up at this blog!  If you do, you would probably really like this recipe.  It has tender shell noodles that curl around each other, and lots of creamy, cheesy, herby sauce studded with the occasional tomato chunk.  If I may say, this is a restaurant quality pasta dish and is even prettier than the average casserole (not that you can tell from my photos!).  It's funny because before I baked it, I wasn't sure how great it was going to be.  The sauce mixed with the pasta tasted fine, but not amazing.  Something magical happened in the oven, though.  The flavors combined and mellowed- and ended up being something wonderful!

 This is a recipe I kinda sorta thought up a couple of weeks ago and finally made last night.  I say "kinda sorta" made it up because it was inspired by this Baked Macaroni and Cheese recipe from Food.com.  If you take a peek at the original you can see that it is VERY different from what I actually made and I've basically made it unrecognizable!  That's just what I do :oD  I think it's different enough that I can call it my own recipe!

Quick note:  The shells I used for this were bigger than normal.  Certainly not as big as the kind you use for stuffed shells, but bigger than the ones I normally see.  If you can find those, buy 'em, because they're perfect for holding all the yummy sauce!


Creamy Herb and Tomato Shell Casserole

1 lb shell pasta
4 T butter
3 cloves garlic, minced
 1 t salt, plus more
1/2 t crushed red pepper flakes
2 t dried basil
1 t dried oregano
4 C milk, divided
4 T cornstarch
8 oz freshly grated parmesan, divided
8 oz grated monterey jack cheese (or mozzarella), divided
16 oz can Italian stewed tomatoes with some of the juice drained off

Preheat oven to 350 and grease a 9 by 13 baking dish.  In a large pot of lightly salted water, boil pasta until just before al dente.  It will continue cooking in the oven.  Drain, return to pot, and cover.

While pasta cooks, melt butter in a medium sauce pan over medium heat and saute garlic until golden.  Add seasonings and cook a few seconds.  Add 3 1/2 C milk and heat almost to a simmer.  In a measuring cup, stir together remaining 1/2 C milk and cornstarch until smooth.  Stir into sauce and stir constantly until sauce thickens, then continue cooking and stirring for another minute.  Remove from heat and stir in all but 1/2 cup of the parmesan until melted.

Add sauce to pasta and stir to coat.  Taste and add more salt if if needs it (I ended up adding another teaspoon).  Pour half of the pasta into the baking dish and top evenly with the stewed tomatoes and 1 cup of the monterey jack cheese.  Top with remaining pasta, the rest of the parmesan, and the rest of the monterey jack.

Bake until lightly golden and bubbly, about 40 minutes.  Let sit for 10 minutes before serving.

Yield: About 10 servings

Saturday, November 10, 2012

Cheater's Pie Crust

Are you really bad at rolling out pie crusts, or just don't like the hassle?  And when it comes to pie, are you more interested in what's in the pie rather than the crust?  If so, then this is the pie crust for you!  If you're fantastic at making pie crusts and/or love traditional pie crust with a passion, you will probably want to pass on this recipe.  It's not bad by any means- I wouldn't make it if it was a bad recipe- but it doesn't have the flaky thing going on that so many people love.  It's more like a vaguely tasty delivery system for luscious pie filling and lets what's in the pie take center stage.

Now, to the recipe.  I first made it with this pie from AllRecipes 10 years ago and have been making it ever since, with a few minor changes.  If I'm making a pie with just 1 crust and a gingersnap or graham cracker crust won't cut it, or it's something savory like quiche, then this is the recipe I use.

Sorry there's not a picture of the plain crust, I meant to take one tonight but I forgot and went ahead and poured in the filling!  Here's a picture of it once filled and baked though, you can see that it holds up just fine to being cut and served:


Cheater's Pie Crust

1 1/2 C flour
1 1/2 t sugar
1/2 t salt
1/2 C oil
2 T water

Place first 3 ingredients in a pie plate and toss with a fork to combine.  Add oil and water and mix with the fork as much as you can, then dive in with your hands to finish mixing in the flour.  Try not to over work it.  Press some of the dough up the sides of the pan, then crumble the rest into little pieces evenly into the bottom of the pan.  Press the dough down to form a solid crust without any holes or cracks.  Proceed with your recipe as if it were a regular pie crust.

Thursday, November 8, 2012

Homemade Taco Seasoning

If you've never mixed up your own taco seasoning, you should really give it a try!  I have been making it myself since I came across this recipe on AllRecipes a couple of years ago.  If you have tacos a lot, you will save yourself quite a bit of money, especially if you buy spices in bulk.  This mix also tastes better than packaged seasoning and doesn't have any weird ingredients.  And if you need any more convincing, it doesn't take any more time to cook taco meat with this than the packaged kind.  If you mix up a big batch of the seasoning, all you have to do when you're cooking the meat is measure out the taco seasoning, sprinkle on a little flour, add water, and cook and stir.  Easy peasy!  Oh, and great served on homemade tortillas.

This base recipe is pretty mild heat wise, though that will depend on your chili powder and other ingredients to some extent.  It shouldn't be too hot for kids or people who don't like spicy.  If you want it hotter, just add more cayenne!  You can also leave out the salt (though I already cut down on the salt by 1/3 in the recipe I posted) or change any other ingredients.  Maybe even add a smidge of cocoa powder.  There are lots of options.  Oh, and you can use this for things other than meat- I'll bet it would be good in chili or sprinkled on popcorn or french fries.  In a couple weeks I plan to make roasted cashews sprinkled with this taco seasoning.  Yum!

Seasoning all mixed up:
  

and cooked with ground turkey:


Homemade Taco Seasoning

4 T chili powder
3 1/2 T paprika
3 T cumin
2 T onion powder
2 T garlic powder
4 t salt
1/4 t cayenne pepper

Place ingredients in a glass jar, put on the lid, and shake to mix.  To make taco meat, brown 1 lb ground beef or turkey in a large skillet.  Drain off fat.  Sprinkle on 2 T taco seasoning and 1 scant T flour (about 3/4 T).  Stir well until meat is coated, then add 3/4 C water and cook, stirring, until liquid has thickened, about 2 minutes.  Serve however you would regularly serve taco meat.

Yield: Enough taco seasoning for about 8 lbs of meat.

Tuesday, November 6, 2012

Tuesdays with Dorie: Buttermilk Crumb Muffins

This week's TWD recipe is for Buttermilk Crumb Muffins.  The recipe is courtesy of Marion Cunningham, a lady who published several well known baking books.  If you'd like to read the recipe, it's hosted over on the blog Easier Than Pie, and you can also watch Marion Cunningham and Julia Child make the recipe together here.  Usually I'm not a fan of cooking shows, but I do enjoy watching the video for Tuesdays with Dorie recipes!

Now, to business.  This was a pretty straight forward endeavor.  I followed the recipe exactly and even mixed up the flour and brown sugar with my fingers like Marion in the video.  Normally I don't like getting stuff on my hands but this was kind of fun!  In the video, they get exactly 12 big muffins by filling the tins almost all the way to the top.  I did the same and my batter loving husband ate what little batter remained, but really it would probably be just as well to make 16 or so muffins instead of 12.

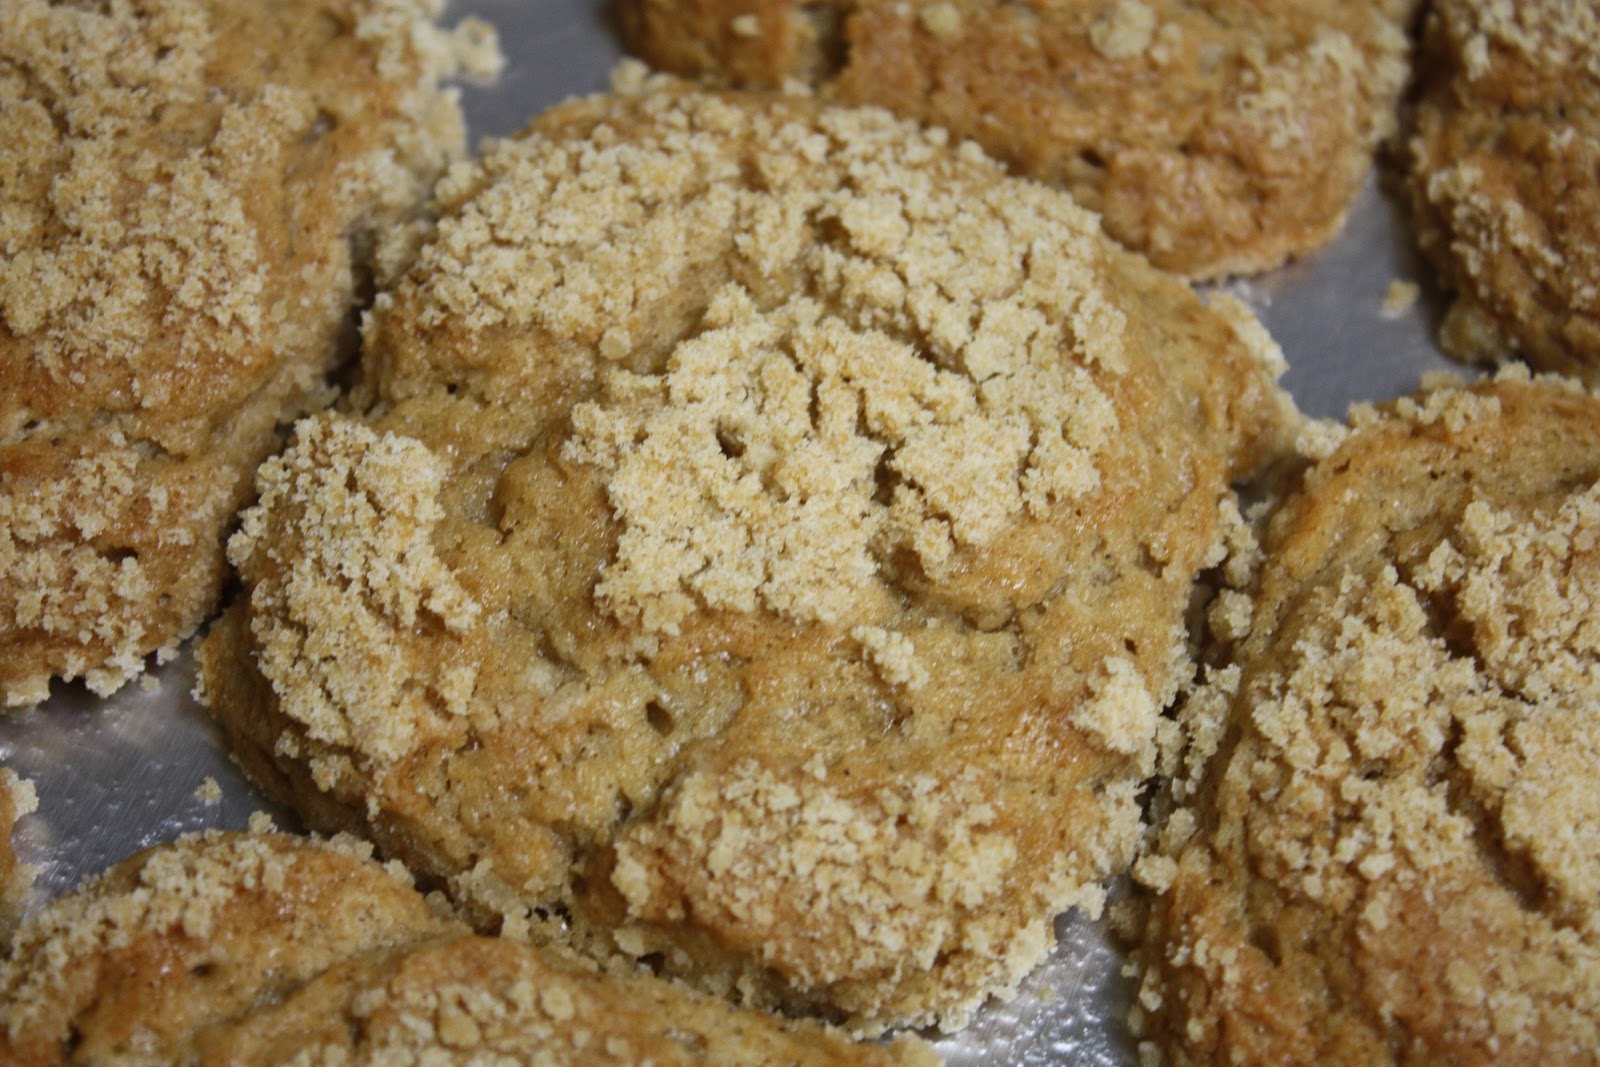
This is what my muffins looked like- just like the video, huh?


Not the prettiest things, but know what?  They sure were good!  They taste very homey and old fashioned.  The cinnamon and nutmeg are pretty mild and the brown sugar gives them a nice, full flavor.  Perhaps not the most exciting muffins ever, but they were FAR from boring.  They actually remind me quite a bit of the glorious Allspice Apple Crumb muffins, only without the apples, a slightly different flavor profile, a different type of crumb topping, and a lot less work.  Admittedly, they are not on the same level as Allspice Apple Crumb muffins, but I can be a bit particular about muffins and I thought these guys were really yummy anyway.  The only part I wasn't completely pleased with was the crumb topping.  It tasted pretty floury and there wasn't a whole lot of it (though next time I could just set aside more!) and it wasn't as crumbly as some, but it was still nice and I think scooping out part of the mixture before adding the rest of the ingredients is part of the charm.

Oh, and sorry there isn't a picture of them out of the pan.  For the love of muffins, use paper liners if you make this recipe!  They didn't stick per se, it's just that they're so soft and fluffy that you end up tearing the tops off the muffins when you try to get them out.  The original plan had been for me to send these to work with my husband, but I don't think his coworkers want to crowd around a muffin tin with spoons, so the muffins will be staying home with us.

Verdict:  A repeat muffin for sure!  Not an every day muffin what with all the shortening and sugar, but good for the occasional treat or to take along somewhere.

Saturday, November 3, 2012

Penne with Herbed Clam Sauce

This is a recipe I randomly came across last week in this thread.  I've never cooked with clams and the one time I had clams with pasta, I didn't like it, but this recipe looked interesting and easy to make so I decided to give it a whirl!  Happily, it turned out quite well and we both enjoyed how well the flavors of clam, shallot, white wine, thyme, and garlic melded together, especially for a sauce that doesn't cook long.  My husband actually said it was one of his favorite things that I've made.  It's also not too bad for you and ingredients that are easy to keep on hand.  I think it will become a regular dinner here!

Quick Note:  The original recipe calls for linguine, but I chose penne because when I serve a sauce that has small pieces in it with long pasta, the pieces inevitably all end up in the bottom of the bowl after the pasta is gone!  Also, I didn't have fresh herbs, but I'm sure it would be yummier (and prettier!) with them.

Sorry this is so very ugly- I promise that it tastes good and the fresh herbs would brighten it up!


Penne with Herbed Clam Sauce

2 T butter
1 large shallot, chopped finely (about 1/2 C)
2 cloves garlic, minced
2 1/2 T flour
8 oz clam juice (1 bottle)
1/2 C white wine
10 oz can whole baby clams, undrained
2 t minced fresh thyme or 3/4 t dried thyme
1/4 C minced fresh parsley or 2 t dried parsley
3/4 t salt (or to taste)
1/2 t pepper
1/2 lb dried penne pasta

In a small pan, melt butter over medium heat.  Add shallot and garlic and saute until softened and golden, about 5 minutes.  Add flour and stir until incorporated.  Stir in the clam juice, a small amount at a time, making sure the sauce is smooth between each addition.  Add wine, clams, herbs, salt, and pepper.  Simmer, stirring frequently, about 5 minutes.  Toss with penne.  Serve pasta with salad and fresh fruit.

Yield: 4 servings